[Miniatures] Painting tips and progress reports (with pics!)

All discussions regarding Board, Card, and RPG Gaming, including industry discussion, that don't belong in one of the other gaming forums.

Moderators: The Preacher, $iljanus, Zaxxon

Post Reply
User avatar
TiLT
Posts: 4435
Joined: Sun Oct 17, 2004 7:01 am
Location: Trondheim, Norway
Contact:

[Miniatures] Painting tips and progress reports (with pics!)

Post by TiLT »

As promised in the Reaper thread, here's a new thread for discussing painting and showing off what we do.

I just started working on my Zombicide minis, and will document some of my efforts here. It's been 10 years since the last time I painted miniatures, so I'll be learning as I go, and you'll be able to see what kinds of results an amateur can come up with.

Since Zombicide contains a shitload of minis, I'll be going for a method of painting that gives good results with a minimum of time involved. Painting a miniature typically contains the following steps (as far as I know):

1) Cut away mold lines and other artifacts from the molding process, and file down areas that need to be glued together.
2) Wash the mini in warm water and dish soap.
3) Prime it, either with spray or with a brush. Spray is recommended.
4) Apply a basecoat. This will contain the miniature's basic color scheme with few bells and whistles. This is not the time to apply highlights or shading.
5) Shade the mini. There are multiple ways to do this, including wet shading, inks, washes, quickshade, and so on.
6) Highlight it. This can also be done in multiple ways, such as wet shading (as part of the previous step) or dry brushing.
7) Base it. Use glue and various kinds of materials meant for basing. Apply some paint if you want.
8) Apply varnish to protect the paint. The best way is gloss varnish followed by matte varnish for the best look combined with the most resilience.
9) Add vegetation to the base.

For Zombicide I will follow a simpler procedure:
1) Spray prime.
2) Basecoat.
3) Quickshade.
4) Highlight (selected minis only).
5) Matte varnish.

I may do basing, but I don't think it'll be such a good idea with the minis loose in the box. Notice that I'm skipping the cleaning of mold lines. It's fiddly work and I just can't be bothered with this many minis. It'll affect the results, but that's okay.

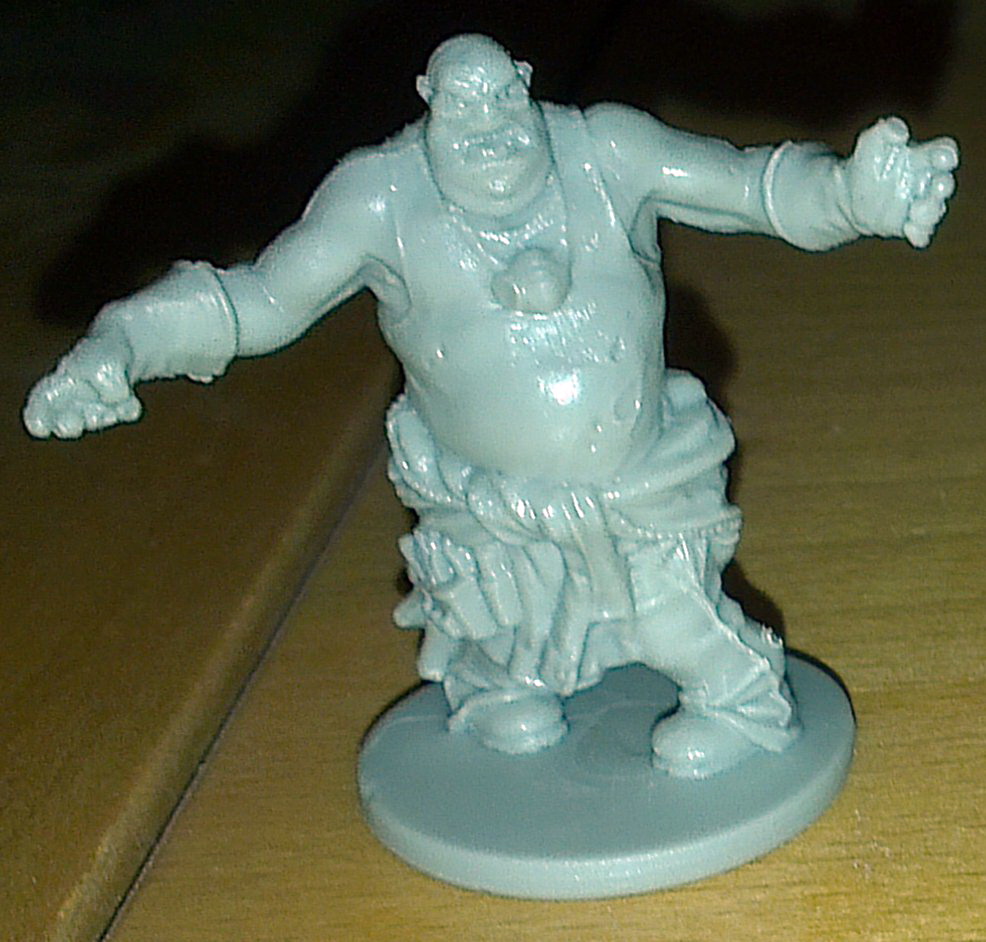
Here's a fatty, straight from the box: (apologies in advance for the picture quality. It's a combination of poor lighting and a cell phone camera. Click on the pictures to see a higher-res version)
Enlarge Image

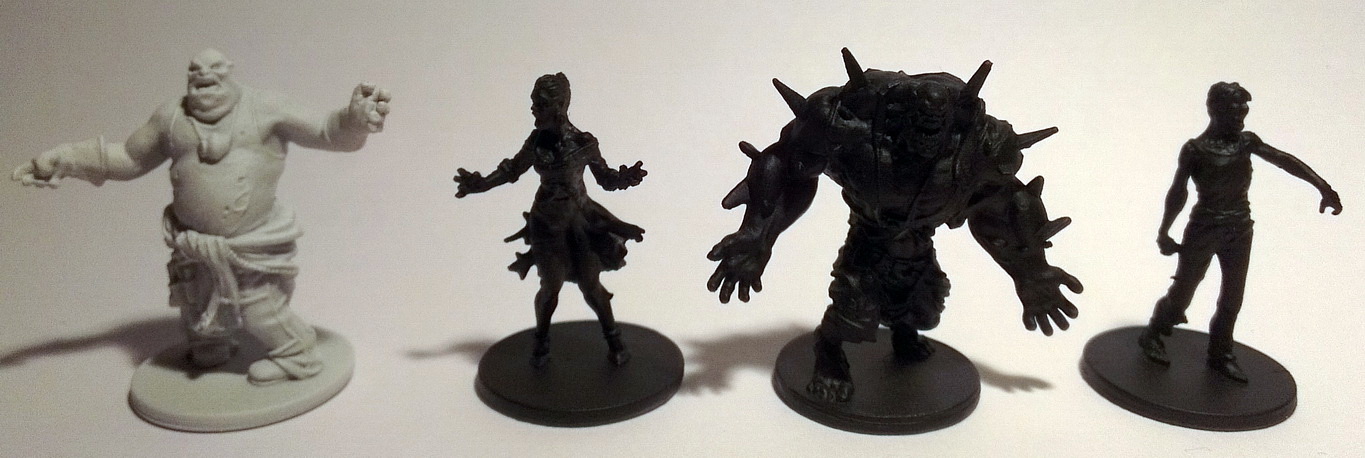
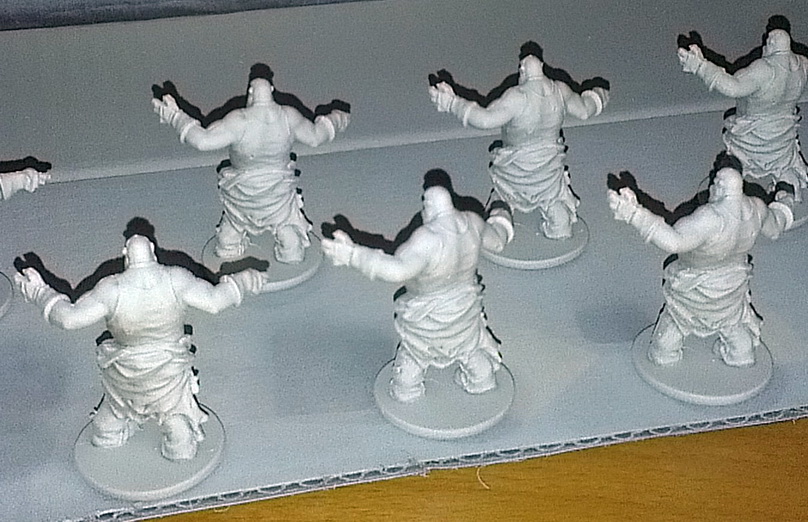
The fatty is wearing a shirt, and for most of them I want the shirt to be white, so I'll be priming these using white primer. Notice the mold lines on his shoulders. They'll be noticeable also after painting, perhaps even more so. Here's a bunch of fatties immediately after priming:
Enlarge Image

I'm doing the spray priming inside a cardboard box since I'm doing this inside. Don't want primer all over my furniture.

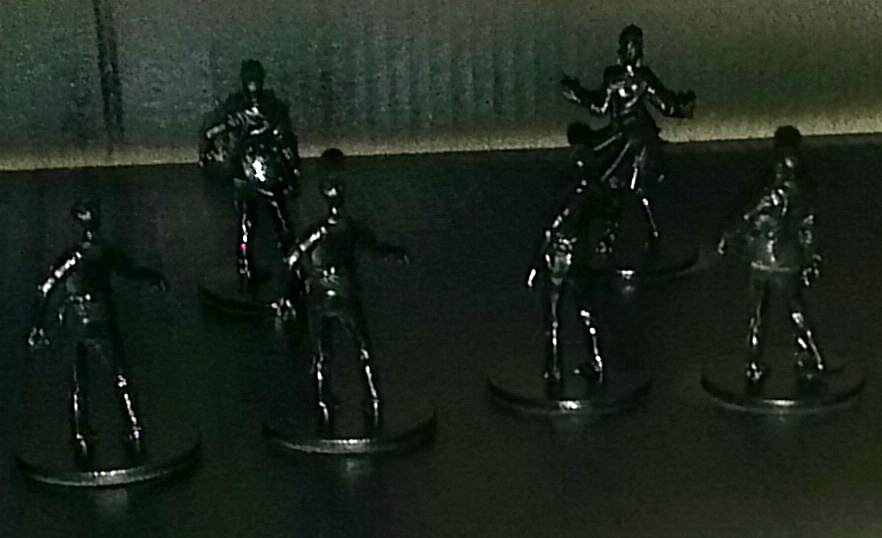
I want my walkers to be dark and dirty, so I'm using black primer for them. Here's a bunch of them inside a cardboard box. Notice the primer is still wet. Once again, I apologize for the quality. Dark box + dark minis leads to poor pictures.
Enlarge Image

I wasn't sure if I wanted the abominations to be primed white or black. In the end I went with black because it's easier to make them look "evil" that way.
Enlarge Image

The runners I'll do later. I plan to do both basecoating and quickshading tonight, so hopefully I'll have something more interesting to show you tomorrow.
Insert witty comment here.
User avatar
TiLT
Posts: 4435
Joined: Sun Oct 17, 2004 7:01 am
Location: Trondheim, Norway
Contact:

Re: [Miniatures] Painting tips and progress reports (with pi

Post by TiLT »

Alright, a more exciting update this time. I managed to sit down tonight and paint 5 walkers, which took a lot longer than I had expected. Much of that comes down to lack of experience, and I had to figure out through experimentation how to mix my colors.

Here's a better view of a few of the primed minis after having dried overnight. I'm taking somewhat better pictures this time, but I still don't have a good enough light to really show detail, so everything will look at bit dark throughout this picture series. Keep that in mind.
Enlarge Image

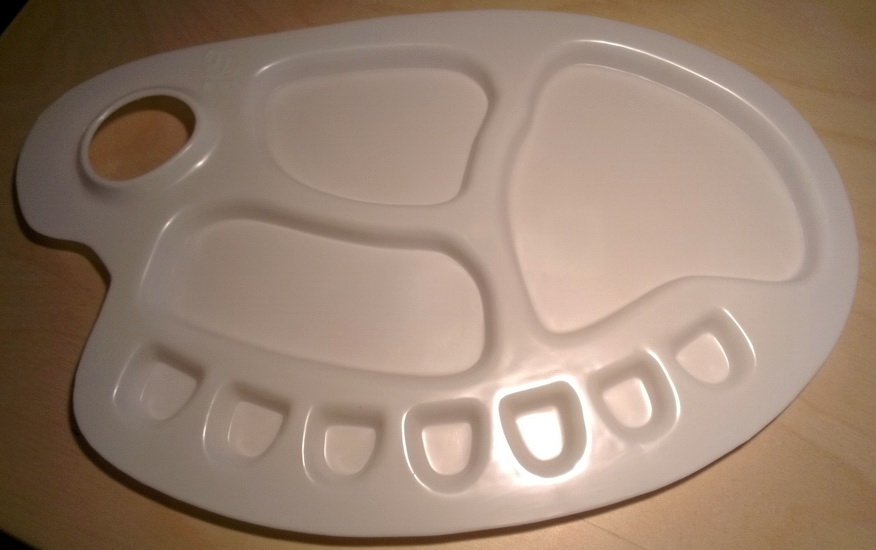
Let's go through some of the equipment I will be using. First, here's the palette for mixing colors:
Enlarge Image

Here are some crappy, synthetic brushes for the kind of work that destroys them too fast for me to want to waste proper ones:
Enlarge Image

And some proper brushes, courtesy of Citadel:
Enlarge Image

Let's not forget paint! I've got two cases like this, and I'll get two more sets of colors when the first rewards from the Reaper Kickstarter are sent out:
Enlarge Image
Most of the above paint is of the Reaper MSP HD series, which is slightly different from the paint we'll get through the Kickstarter. These are more suited to basecoating than the Kickstarter paints, which are better at layering and washes. This suits me fine, since almost all the work I'll be doing for Zombicide will be basecoating.

Speaking of which, let's see how my walkers looked after I basecoated them with a skin color:
Enlarge Image

Not all that good, but not all that bad either. At least the color is right, though the primer can easily be seen through it. It's obvious we need another layer. Notice that I'm being very sloppy with the paint, spilling it onto parts of the mini where it's not supposed to be, and in some cases outright painting parts in the wrong color (such as the hair). This is OK as long as you start at the innermost "layer" (skin) and work your way out (clothes, armor, etc). The mistakes get fixed as you keep going.

For the record, here's the mix I used for this basecoat:
  • 3 parts Maiden Flesh
  • 2 parts Field Grey
  • 2 parts water
In hindsight, I should have used less water. The Reaper paints are already very thin, so you can get by without water for this part if you're a little careful. This also depends on the color, as each color seems to have a different consistency. Because my mix was so thin I had to do two passes, which took time. Here's the result of the second pass:
Enlarge Image

Much better. Let's do the rest of the colors as well:
Enlarge Image

Now we're getting somewhere! Still sloppy, particularly around the feet, but I'll fix that up later. I added some blood for effect. There are two different shades of blue being used for the jeans, but it turned out to be hardly noticeable so I might just use the brighter shade for later minis. I'm deliberately going for dull colors here as the zombies aren't supposed to stick out on the board. That's what heroes are for.

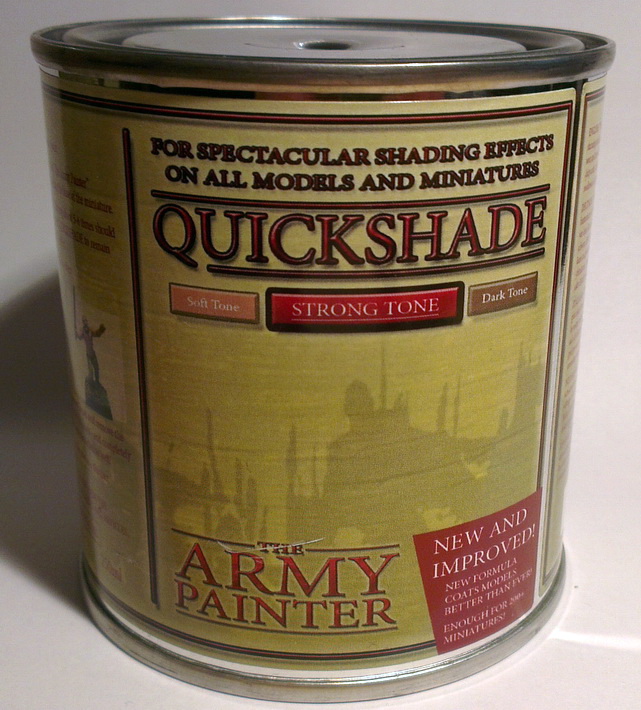
The zombies are starting to look nice, but we're far from done. The next step in any painting procedure should be shading, which is an artform. That's why I'm going to cheat, using this:
Enlarge Image

Quickshade is a turpentine-based inky substance that you're supposed to dip the minis in. I use a brush instead as it's neater and saves Quickshade. What this does is that it runs into any cracks and crevices it can find and stays there. All you have to do is wipe the entire mini with the Quickshade and make sure it doesn't pool up anywhere (just use a brush to get rid of excess shade). Using Quickshade you can give your minis a nice shading effect in a minute's work. Applying it was a bit scary at first since my minis turned completely brown during the first few seconds. Here's the result: (I've turned up the brightness a bit so that it'll be possible to see details in the pictures)
Enlarge Image

Whoa, that's quite a change! The zombies look much darker now, and kind of weird. Don't worry though, we'll tweak them later, but not today. Quickshade needs to dry for a minimum of 24 hours before you can do anything else with it. Don't worry about the shiny look they got. By the time we're done, that look will be gone.

What did I learn today?
  • Quickshade is darker than I thought. I should use a brighter basecoat for future minis. The jeans look fine though.
  • Reaper paint is thinner than you might think. I'll try basecoating my next mini without adding water to the paint.
  • I don't have white paint. I was planning on some white shirts for the walkers, but I guess I'll just have to abandon that idea for now. I'm getting white paint through the Kickstarter, which is why I didn't order any in advance. Seems it was a better idea than I thought to prime the fatties white.
  • Splattering minis with "blood" is fun and easy, and gets amazingly good results as long as the paint is properly thinned. The Quickshade means the blood gets very dark though, so I'm going to have to touch it up after the shading part of the process to make it look bright and fresh.
  • Basecoating is more time-consuming than I thought. I'm going to have to cut down the time spent on this or I'm never going to get done. White primer may mean that I can get away with just one layer, which would make a huge difference. I guess I'll see when I paint the fatties.
  • I forgot to paint the ties. *sigh*. Oh well, I'll do it during the touchups.
Feel free to comment on what I've done so far. This thread is for discussion, not just for my progress reports. :)
Insert witty comment here.
User avatar
Blackhawk
Posts: 46010
Joined: Tue Oct 12, 2004 9:48 pm
Location: Southwest Indiana

Re: [Miniatures] Painting tips and progress reports (with pi

Post by Blackhawk »

I'd promised a painting tips and how-to thread myself. Do you mind if I tag along on yours, or would you prefer I keep my stuff separate?
What doesn't kill me makes me stranger.
User avatar
TiLT
Posts: 4435
Joined: Sun Oct 17, 2004 7:01 am
Location: Trondheim, Norway
Contact:

Re: [Miniatures] Painting tips and progress reports (with pi

Post by TiLT »

Blackhawk wrote:I'd promised a painting tips and how-to thread myself. Do you mind if I tag along on yours, or would you prefer I keep my stuff separate?
I made it for anyone to use. You (all of you!) can post as much as you want in here. :)
Insert witty comment here.
User avatar
stessier
Posts: 30129
Joined: Tue Dec 21, 2004 12:30 pm
Location: SC

Re: [Miniatures] Painting tips and progress reports (with pi

Post by stessier »

I have never painted miniatures and probably never will, but I'm really enjoying your write ups. Please keep them up!
I require a reminder as to why raining arcane destruction is not an appropriate response to all of life's indignities. - Vaarsuvius
Global Steam Wishmaslist Tracking
Running____2014: 1300.55 miles____2015: 2036.13 miles____2016: 1012.75 miles____2017: 1105.82 miles____2018: 1318.91 miles__2019: 2000.00 miles
User avatar
silverjon
Posts: 10781
Joined: Wed Mar 12, 2008 7:16 pm
Location: Western Canuckistan

Re: [Miniatures] Painting tips and progress reports (with pi

Post by silverjon »

stessier wrote:I have never painted miniatures and probably never will, but I'm really enjoying your write ups. Please keep them up!
Yeah, this isn't a hobby I have any interest in pursuing myself, but I enjoy seeing the what others do with it.
wot?

To be fair, adolescent power fantasy tripe is way easier to write than absurd existential horror, and every community has got to start somewhere... right?

Unless one loses a precious thing, he will never know its true value. A little light finally scratches the darkness; it lets the exhausted one face his shattered dream and realize his path cannot be walked. Can man live happily without embracing his wounded heart?
User avatar
YellowKing
Posts: 31133
Joined: Wed Oct 13, 2004 2:02 pm

Re: [Miniatures] Painting tips and progress reports (with pi

Post by YellowKing »

Thanks for posting this, TiLT, very informative and entertaining.

I'm still working on my minis and will post some pics when I'm finished. Slow going and I got off to a rough start since I thinned the paints too much and screwed up my base coating. That's taking some extra time to repair the damage.
User avatar
Blackhawk
Posts: 46010
Joined: Tue Oct 12, 2004 9:48 pm
Location: Southwest Indiana

Re: [Miniatures] Painting tips and progress reports (with pi

Post by Blackhawk »

Well, alrighty, then. I started painting good old plastic models when I was about eight (1981 or so), and bought my first roleplaying miniatures in '89. I painted nonstop for a decade, then took a break until a couple of years ago. I'm not a great miniature painter. I'm OK, but you'll never see me winning any contests or in the top bazillion on CoolMiniOrNot (CMON.)

What I plan to do is cover the basics here for anyone who either hasn't painted or is just curious. I suckered a bunch of you into the hobby with the Reaper Kickstarter thread, so I'd might as well set the hook. I intend to do something of an introduction rather than a tutorial. There are people out there who are far better painters than I who have done fantastic tutorials. I will link to them when it actually comes time to explain how to do each technique (I love the idea of progress reports, too, and will likely jump in on that.)

Note that we already have a show-off thread here.

Now, the disclaimers: Miniature painting is a very, very individualized process. After a while, different people will end up using different media and techniques (I've yet to find someone else who uses Pelikan drawing inks for washes, while I've been doing it for 15 years.) Some people will take to a technique, others will never be able to get a handle on it. All I can do is talk about what I do.

Second, there is more than one type of miniature painting. That's important - a bunch of the 'how-to' stuff out there may be for a type of painting other than what you're planning on doing. These aren't formalized divisions, by the way, but are rather representative of approaches to painting.

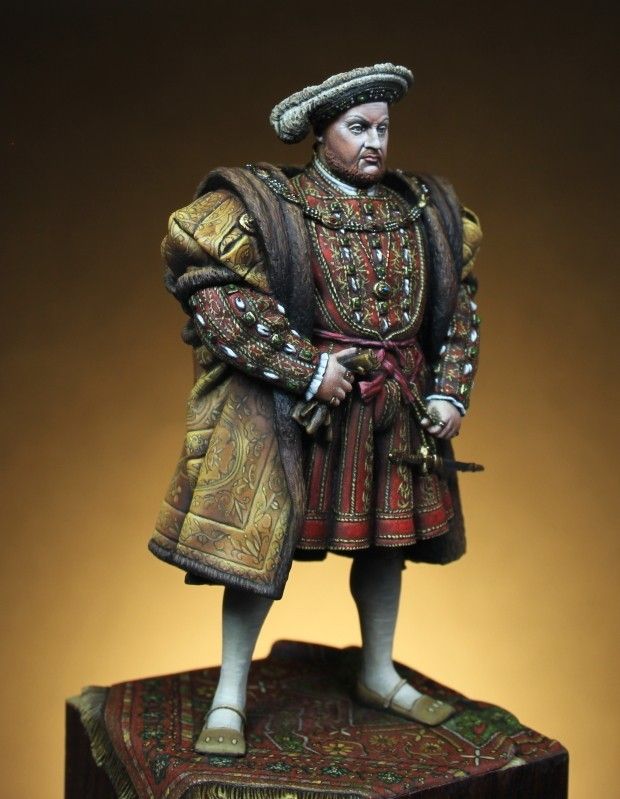
Display painting: This is the most difficult, advanced, and time-consuming type of painting. The idea here is that you are creating a single piece, not for gaming, but for competition or display. It isn't unusual for a painter to put dozens of hours into a single piece to get it just right. The results are beautiful, but not at all suited for gaming - you want these things in a glass display case, not getting knocked over by a rogue d20 or covered in Cheeto dust.

Examples (from CMON):

Enlarge Image

Enlarge Image

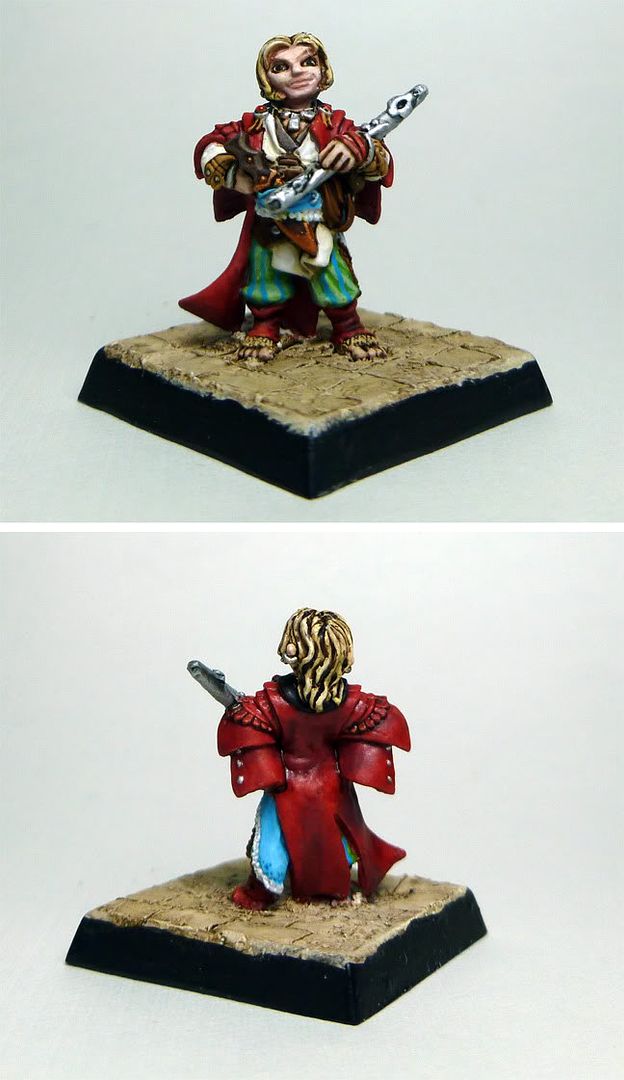
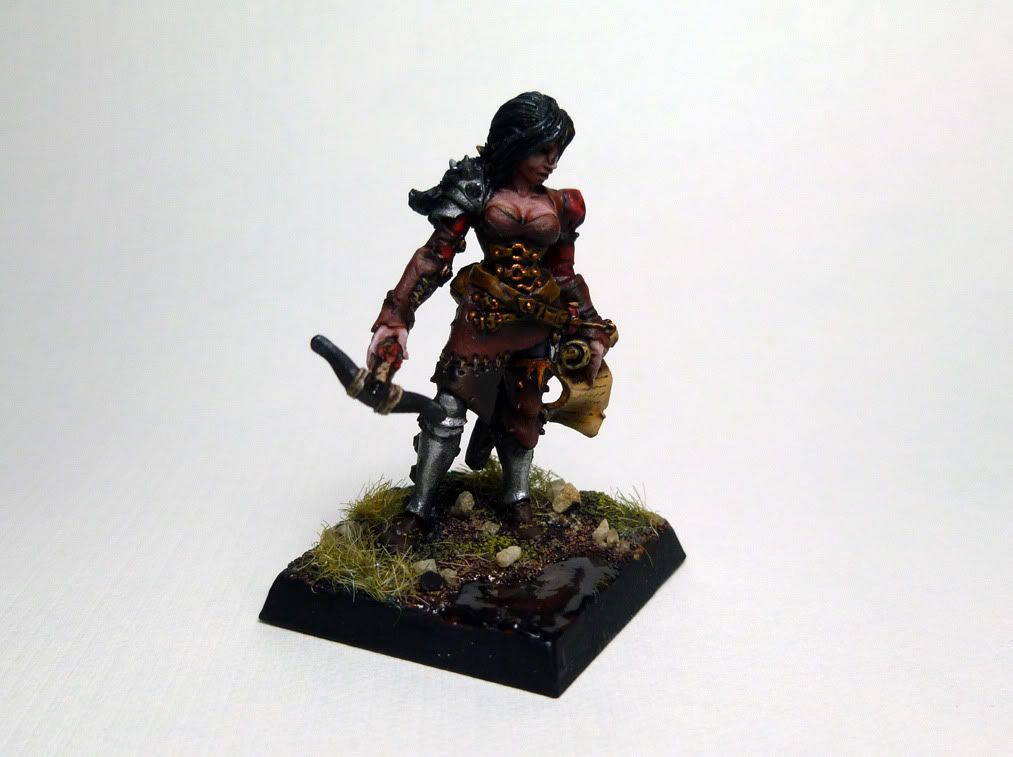
Character painting: The goal here is to make a really good looking figure that is still something you're willing to play with. It is the happy medium between display painting and mass army speed-painting. Most people go this route for PCs and significant enemies in RPGs, or for leaders and generals in wargames. This takes the shading, highlighting, and detailing to a higher level than you would with a rank and file piece, but not to the levels of a competition piece.

Stealing from myself for these:

Enlarge Image

Enlarge Image

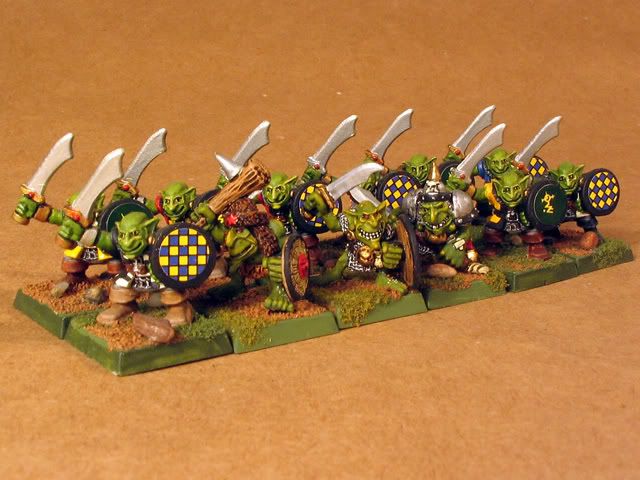
Basic tabletop/army painting: This is the most basic painting technique. The goal here is to make figures look right, but not perfect. It is the opposite extreme from display painting. The idea is that you might have to paint dozens of characters to fill out a wargaming army, the relatively low-quality minis that came with a board game, or dozens of generic monsters for a roleplaying session. You want them to look good, but you can't spend ten hours on each piece. Basic colors, some simple shading and highlighting and you're good to go. It is a fast way to get lots of miniatures on the table quickly.

Example of my own painting using this style. The rank and file goblins are painted this way:

Image

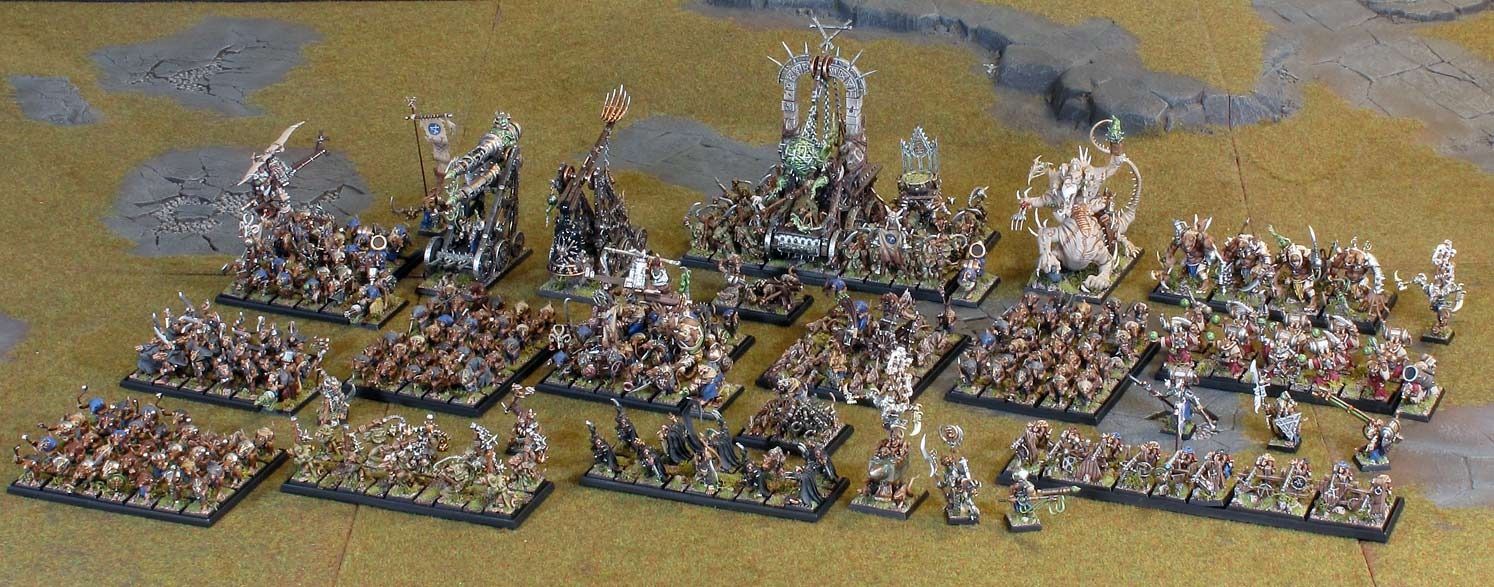
Example, found on the 'net of when you'd want to use it.

Enlarge Image

Each method has a few tips and tricks unique to it, but if you learn character painting you'll have 95% of the techniques down. The others just involve doing a little more or a little less.
What doesn't kill me makes me stranger.
User avatar
TiLT
Posts: 4435
Joined: Sun Oct 17, 2004 7:01 am
Location: Trondheim, Norway
Contact:

Re: [Miniatures] Painting tips and progress reports (with pi

Post by TiLT »

Wow, you're miles ahead of me in skill, Blackhawk. I've only got the theory down, but it's been 10 years since the last time I painted, and in hindsight I realize that I sucked (my idea of a secret trick to improve any miniature was ink & drybrush. Every. Single. Time.). Working on the experience part now. :)

BTW: I went through every picture I've posted in this thread and adjusted size, color and brightness to make it look better without bogging down everyone's browsers. The detail in some of the pics should stand out more now too.
Insert witty comment here.
User avatar
Blackhawk
Posts: 46010
Joined: Tue Oct 12, 2004 9:48 pm
Location: Southwest Indiana

Re: [Miniatures] Painting tips and progress reports (with pi

Post by Blackhawk »

Thanks (assuming that you don't think I painted those first two - I wish!)
What doesn't kill me makes me stranger.
User avatar
Isgrimnur
Posts: 84864
Joined: Sun Oct 15, 2006 12:29 am
Location: Chookity pok
Contact:

Re: [Miniatures] Painting tips and progress reports (with pi

Post by Isgrimnur »

Been working on my Takata Dome NSX 2005 model, and painting straight out of the bottle with a mix of Tamiya Acrylics and Model Master Enamels. The acrylics seem to be doing well that way, but the enamels seem to be a bit thick.

Enlarge Image

The brake calipers don't seem too bad for the gunmetal enamel, and the discs are decent under the acrylics, but I'm guessing I need to thin the semi gloss black out to get it to stop lumping up like that on flat surfaces.

I have a bottle that I put into an airbrush jar with some thinner and am about to head out to get a fitting to step the compressor my parents gave me (58 max psi) so that I can hook up the airbrush, as the suspension pieces these attach to are somewhat large and need painting in the same sg black.
It's almost as if people are the problem.
User avatar
Blackhawk
Posts: 46010
Joined: Tue Oct 12, 2004 9:48 pm
Location: Southwest Indiana

Re: [Miniatures] Painting tips and progress reports (with pi

Post by Blackhawk »

On tools. Important point: I'm going to post what I use. This is not what you need to paint. It is simply what I have collected and have found the most useful over 20+ years of painting. Again, this is a 20+ year collection of handy stuff, not what a beginner needs to paint. I'll distinguish what I consider to actually be necessary.

So, here is where I paint (note that I use /bigimg tags - click to embiggen):

Enlarge Image

A few items here bear mention.

The paint rack is just a $9 cabinet organizer from Amazon. The brushes and such are in a desk organizer. The bottles (inks, washes, non-paint liquids) are on a plastic lazy susan I've had for years. The Claptrap is a Claptrap.

Most of my paints are Vallejo, except the metallics, which are Games Workshop.

One item bears mention: The swing arm lamp Well, not the lamp, the bulb. It is a 5500k daylight bulb. It is from Wal-Mart and not expensive, but gives you full spectrum lighting that mimics natural sunlight. It's more important than it sounds. A standard lightbulb (including flourescent) creates a very warm, almost yellow light. That's fine for reading, but colors everything yellow. Your greens will be a different color. Your blues will look a little green, your whites will look a little yellow. When you paint, you'll compensate for that, and the miniature will end up looking off. Using a cheap 5500k bulb gives you natural light mimics the sun (which is what the human eye was designed for), and thus doesn't alter the colors. It is a great investment.

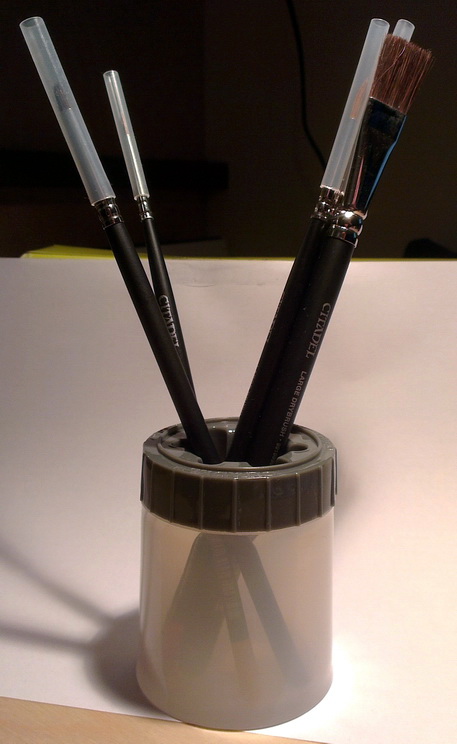
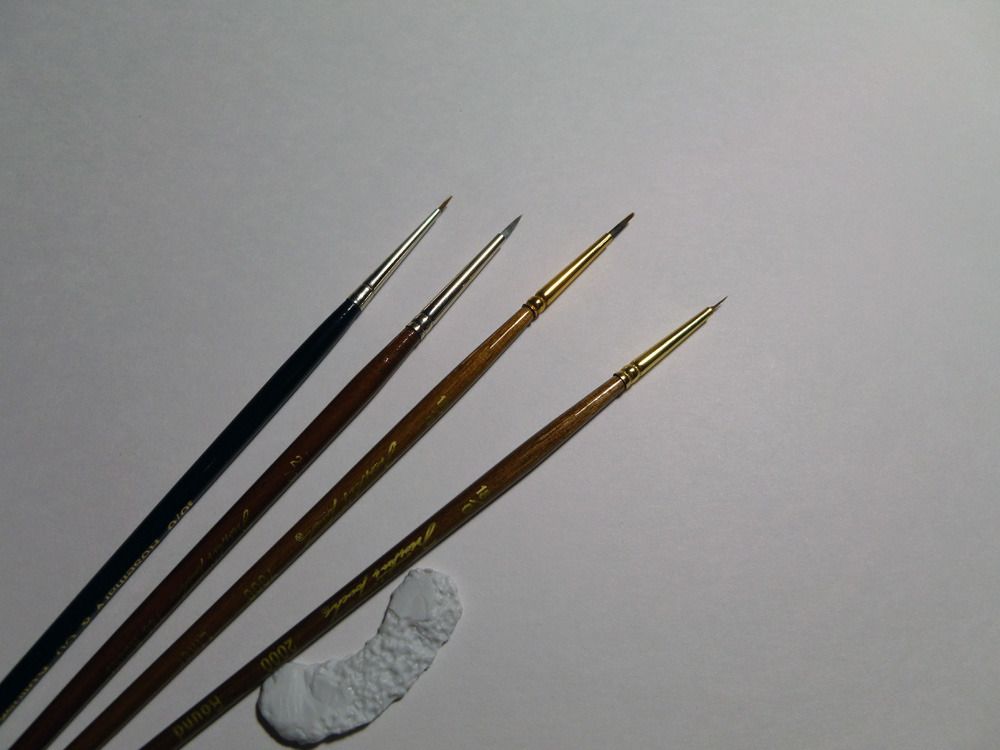
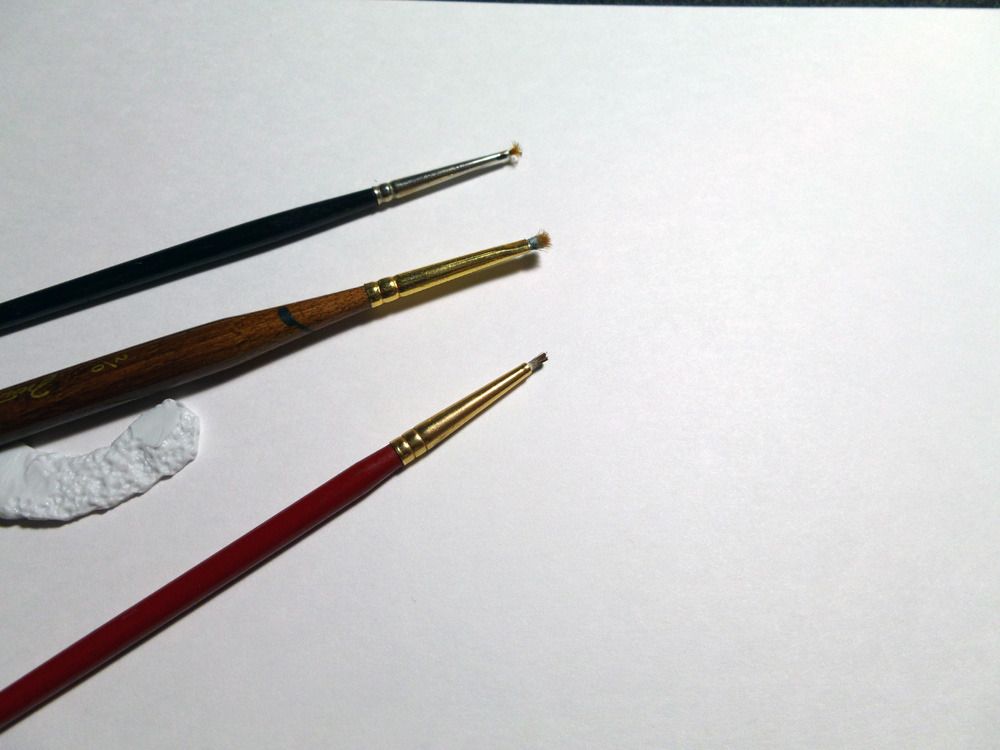
Ok, now the actual tools. Brushes! There are tons of options, and every painter has a preference. Some prefer flat, some prefer round, some prefer large, some prefer tiny. Experiment! I will say that, while good brushes are expensive, you really should invest in two or three really good ones. Having a decent brush makes a huge difference.

Enlarge Image

These are typical of my usual brushes. I prefer natural hair. Most of my painting is done using 2/0, 5/0 and 10/0 round, pointed brushes.

Enlarge Image

These are my drybrushing brushes. Yes, they're supposed to look like that. Later when I describe drybrushing, I'll mention that you want to use old brushes. This is why. ;)

Enlarge Image

These are my small tools. Left to right, top to bottom.

Scissors. - They scis things. I use them mostly for basing. You want fine point, sharp scissors. Moustache scissors work. If you're really wanting the best, look for fly tying scissors online or at a fishing store.

X-Acto knife - With a standard #11 blade. This tool is not optional - I use this more than anything except my brushes. Get a few extra blades while you're shopping.

Hand drill - Also called a pin vice. You hold it in your hand and turn it with your fingers. I bought mine from The War Store as a set with two bits and a set of copper rods the same size as the bits. Used mainly for pinning multi-part miniatures together. Basically, you drill a hole in each piece so that they line up, cut a bit of the rod to fit into the holes and glue the whole thing together. The joints end up much, much stronger than with glue alone. Probably not necessary for Bones, although I also use it for basing. A Dremel tool is an excellent option as well - I use a dremel for heavy metal pieces, the hand drill for plastics (and Bones.)

Bone saw - for cutting miniatures up to make other miniatures. Not needed for Bones, as they cut better with an X-Acto knife. Very handy for working with traditional plastic and metal miniatures if you plan to do any modification (switching heads, changing poses, etc.)

Clippers - One is a wire cutter, the other a set I found somewhere. Used for cutting wires, sprue cutting and so forth. They make specialized sprue cutters that are similar (and I want a set, eventually.)

Dental pick - I have no idea where I got this thing, but it has proven to be incredibly useful for cleaning miniatures, tweaking bits and pieces, etching, filling gaps, and all sorts of other tasks. I have to find more of these things!

Tweezers - For tweezing things.

Toothbrush, soft bristle - straight from the dollar store. A must have for washing miniatures.

Files (a variety) - I actually have about a dozen different files of different shapes. Very, very useful for cleaning metal and plastic miniatures, but useless on Bones.

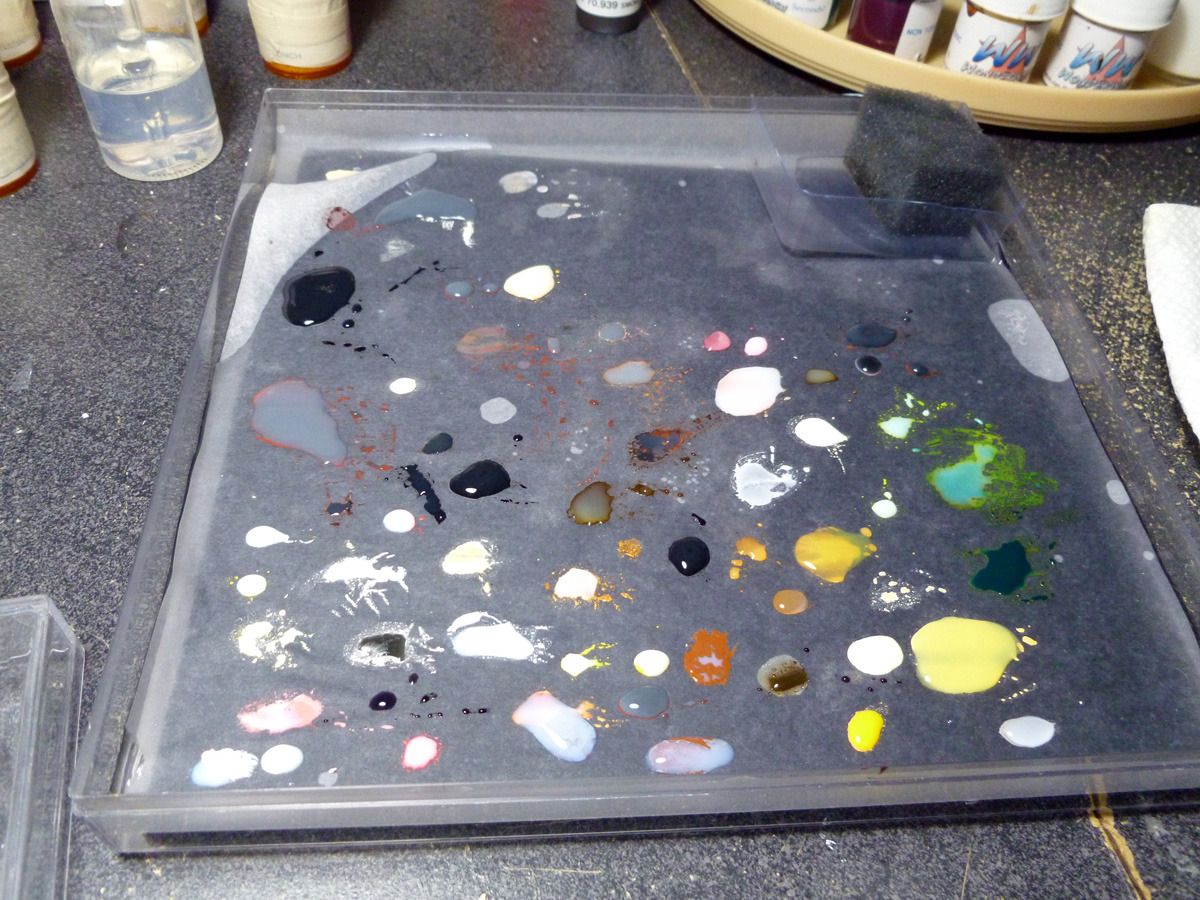
Enlarge Image

A wet palette. I don't know how I got by without one. I'll post more details in a separate post for this item.

Enlarge Image

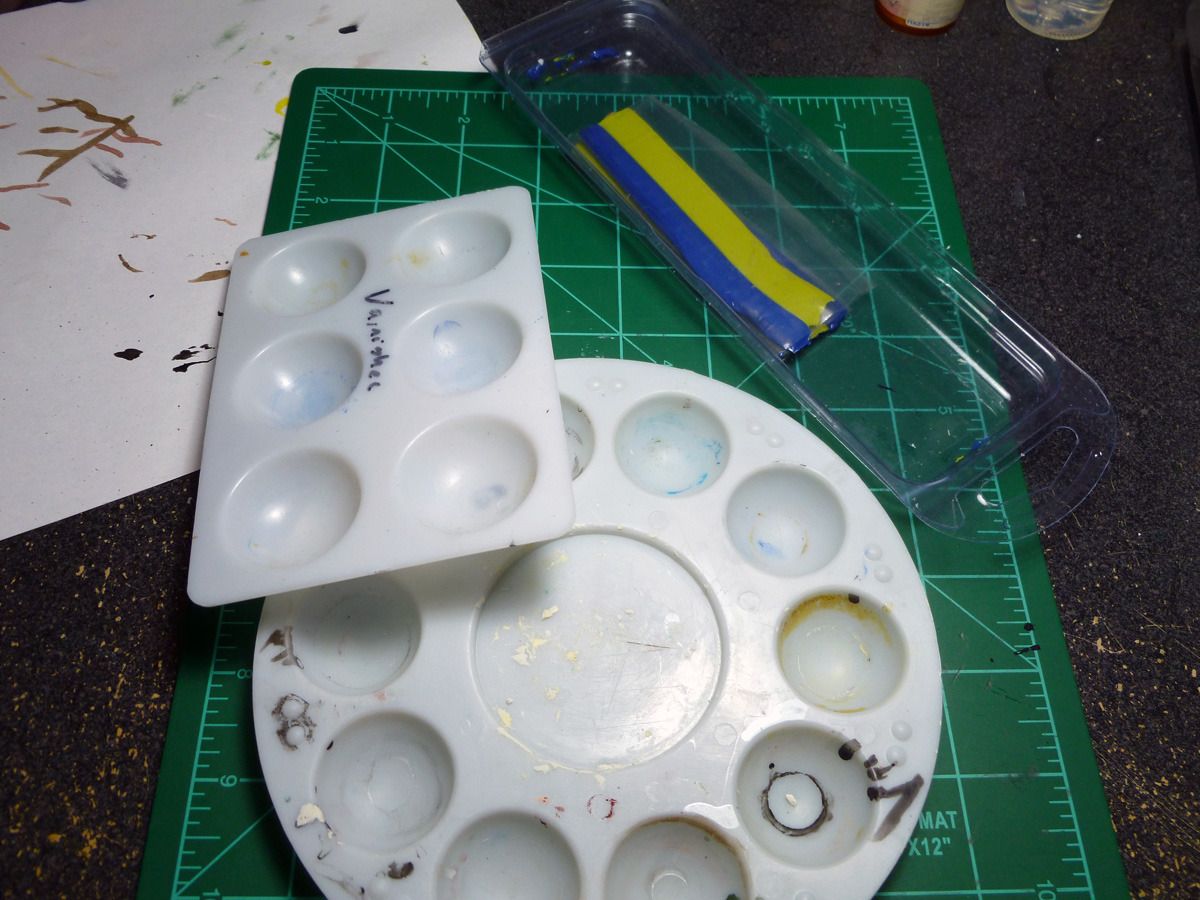
Cutting board - To keep from chopping up your desk/table. This one is a cheap self-healing board from a craft store.

Plastic palettes - I think I got a pack of four of these things for $3 or $4 from a craft store. Great for mixing inks and washes that you don't want in your wet palette (or paints if you don't like wet palettes.)

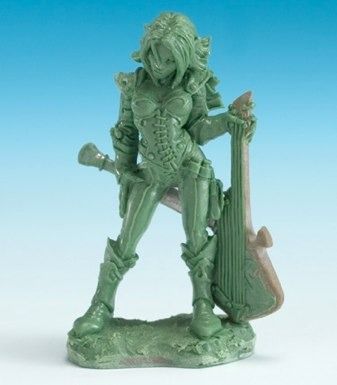
Kneaditite, aka 'green stuff' - a two part epoxy putty. You mix the two together and get a sticky, plastic-like epoxy that you can shape and sculpt, which cures in about 24 hours. This is used for all sorts of things, from filling in gaps in multi-part miniatures to adding extra bits on. This is the same material that miniature sculptors make master sculpts out of. Here, for instance, is one of the original sculpts that Bones buyers will be getting:

Image

Enlarge Image

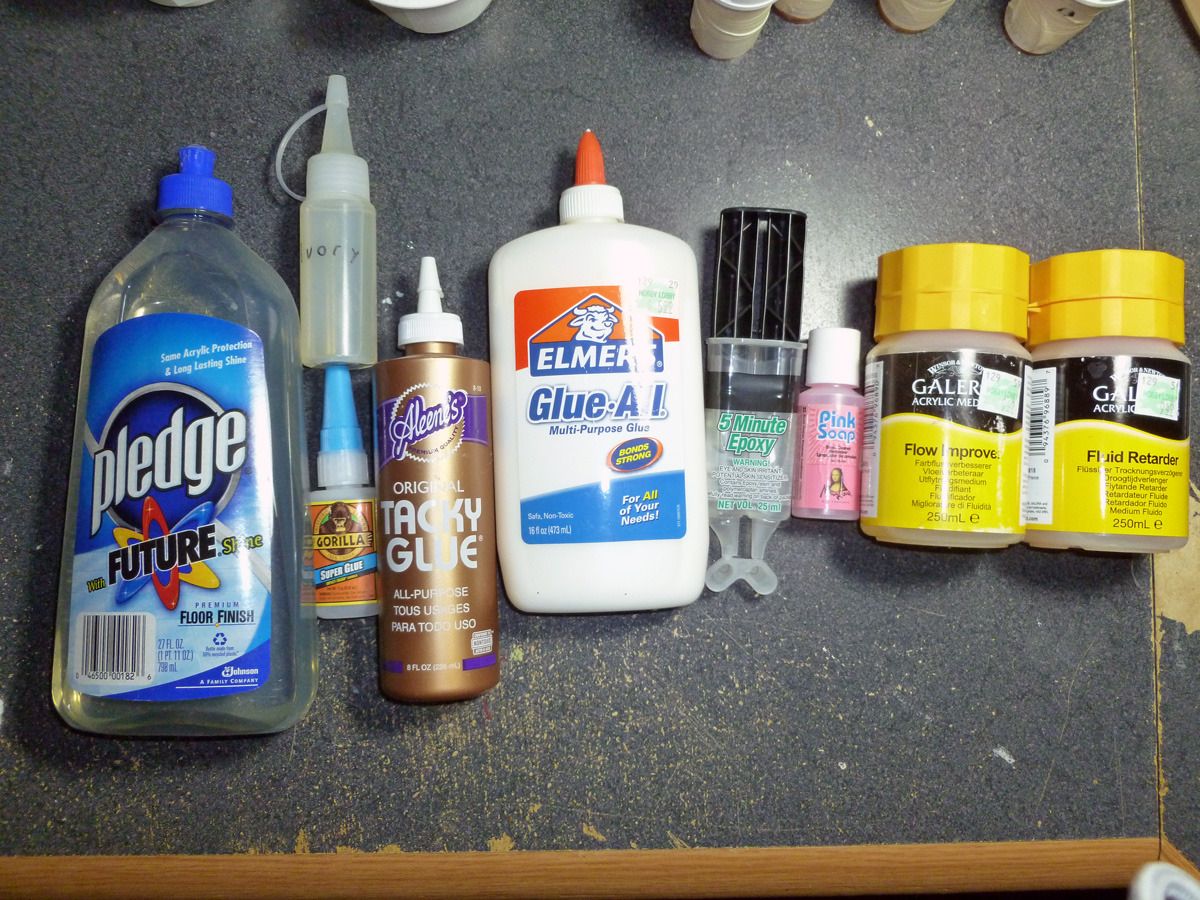
Goo and such. I'm not going to describe each and every item in detail. In order:

Future Floor Polish (see here for uses and foreign equivalents of this amazing stuff.) It is basically a colorless liquid acrylic.

Ivory dish soap (for cleaning brushes an certain washes), super glue, Tacky Glue and white glue (Tacky Glue is essentially a thick, sticky white glue - used on nearly every miniature I do for basing.) Two part epoxy (for gluing heavy miniatures together - use super glue on Bones instead), 'Pink Soap', a special brush cleaning soap, flow improver and fluid retarder - for altering the qualities of acrylic paints, causing them to dry slower or flow differently.

Enlarge Image

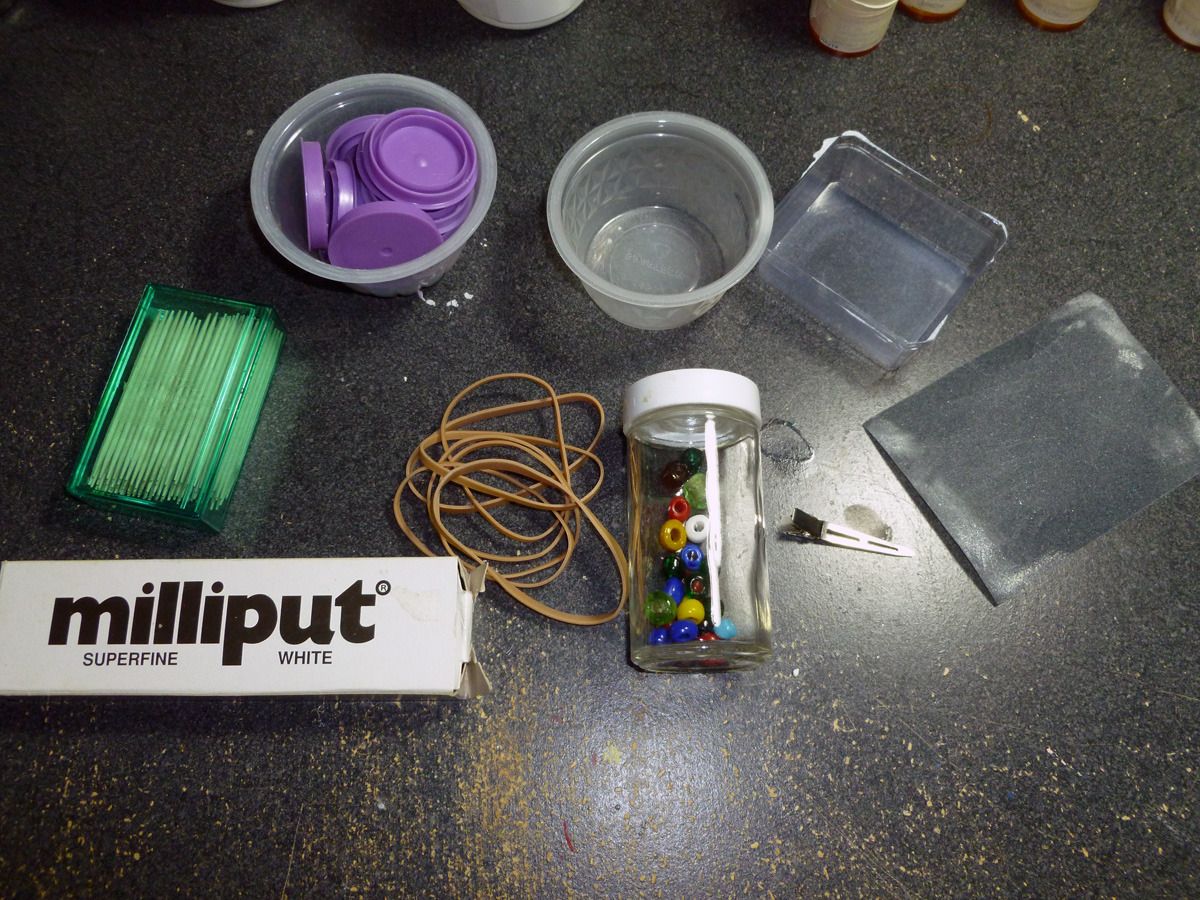
Toothpicks are useful for an astonishing number of things, from precisely applying superglue to unclogging paint bottles.

Milliput is a different sculpting medium, with similar uses to green stuff. Milliput dries harder and can be carved, while green stuff dries with a bit of flexibility. Green stuff feel like working with soft rubber, while Milliput works like clay. Make sure you get superfine white - there are other varieties which are more coarse and less suited to miniatures.

Rubber bands and clips for holding things together while they dry. Ultra fine sandpaper (again, not for bones.) All across the top are scavenged containers - washed out fruit cups, milk jug lids, blister packs with the cardboard cut off. They're great for mixing things in - you mix then toss them out when you're done.

The beads bear mention. Old sources suggest putting a couple of BBs or a small metal nut in your paints to make them easier to mix. Don't do it! They can rust in the paint and the flakes will wreak hell. I grabbed a $1 pack of glass crow beads (make sure they're glass, not plastic - look for mold lines.) Pull off the dropper tops and drop one in each paint bottle and shaking them becomes much easier.

Enlarge Image

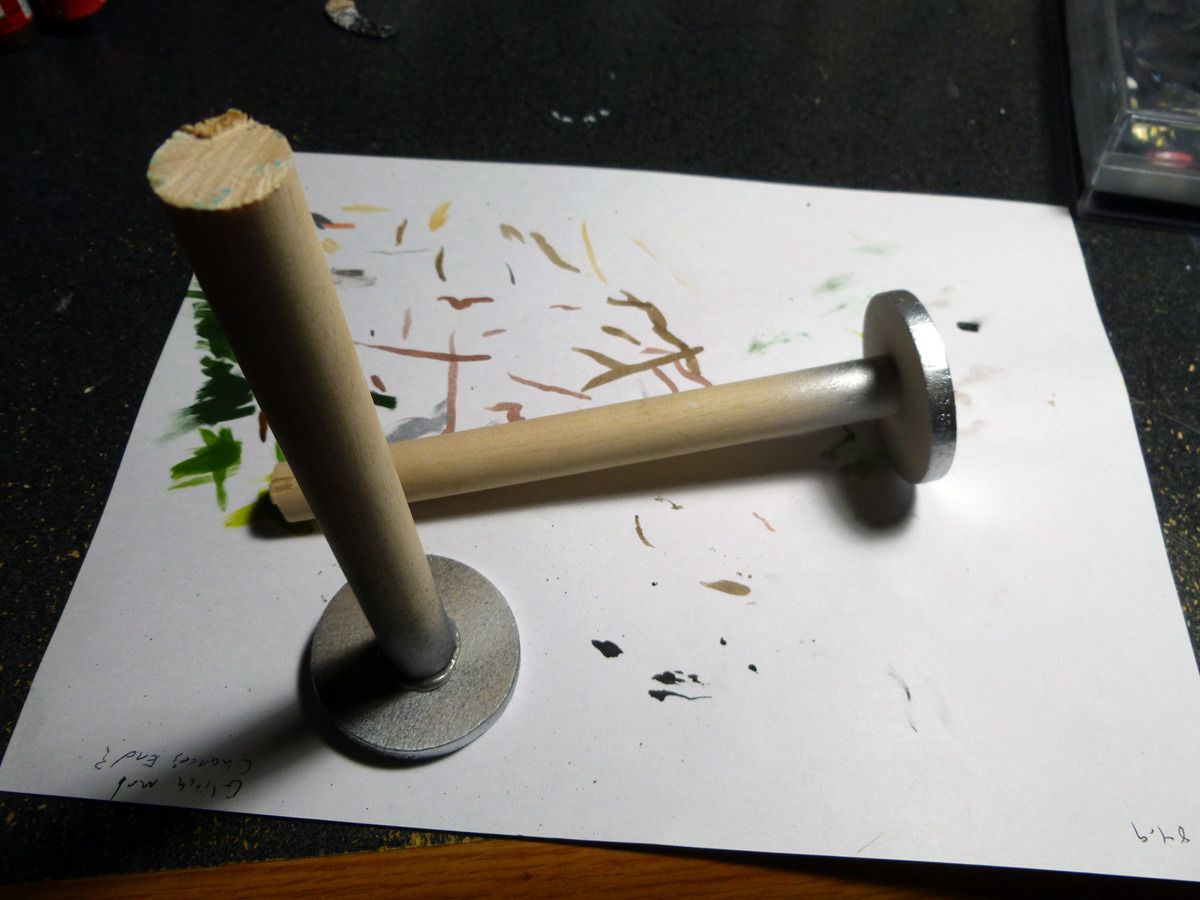
Priming spindles. I had some wooden disks laying around. I cut a couple of pieces of dowel and attached it to the top. A small drop of hot glue, plop the miniature on top and you can prime (or varnish) your miniature without spraying your hands in the process. A quick knife slice and they're off and ready to use again. For larger groups of minis, I hot glue them to an old cereal box of length or wood. Don't use too much glue!

Enlarge Image

One of my favorite tools. Old prescription bottles. I fill them with salt for weight (sand would work, too, but salt is cheaper to get around here.) On top I stick a lump of Handi-Tak (by whatever name - it is a removable, reusable putty intended for hanging posters and is available at Wal-Mart in the stationary section.) I just stick a miniature to the putty and it has a handle while I paint it. When I'm done, I just pull it off and use it again for the next miniature - one lump of putty lasts a year or more. Some people use corks, dowels, or whatever, but I find that these work perfectly for me, and the weight of the salt ensures they don't tip over, knocking the miniatures around. I've also got a couple of larger ones that will handle anything up to and including giants.

Enlarge Image

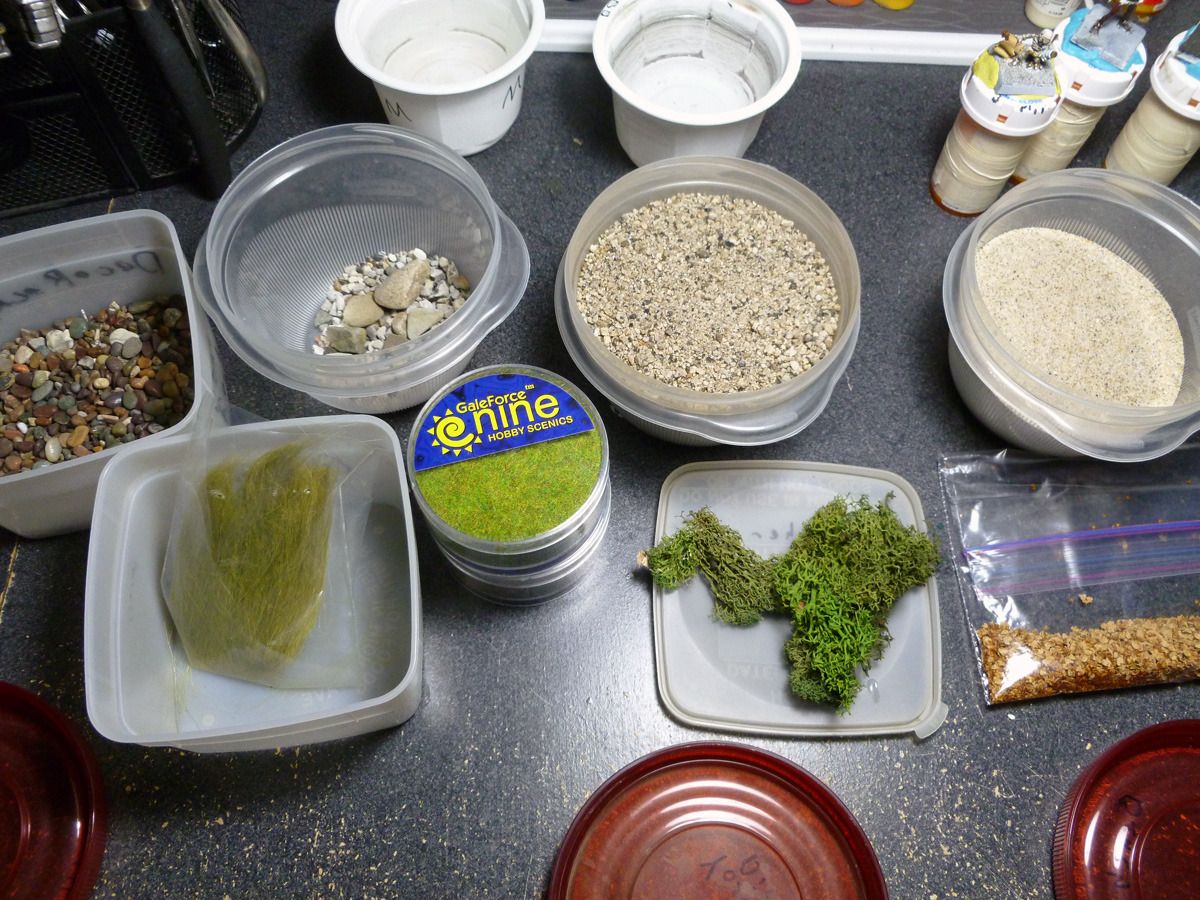
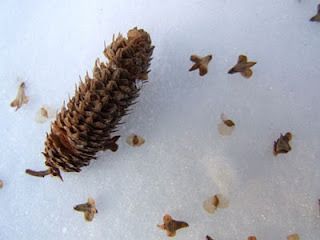
This stuff is all basing materials. A bunch of different sands (beach sand, sand from a couple of different parks, etc.) Try to get sand with natural variations. It looks more natural than the perfectly uniform craft sands. Pebbles to serve as rocks and boulders. Lichen from a model railroad shop for bushes and shrubberies. A couple bear mention. The first is in the bag on the right - birch seeds, a material I just discovered.

Birch seeds in nature:

Image

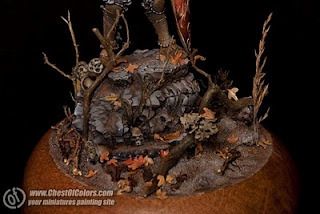
Birch seeds on a miniature base:

Image

For something that many of us can scrap a lifetime supply off of our porches each fall, they're great.

The second item to mention is static grass, the two plastic tubs in the center. Sprinkle some on glue, and - perfect instant grass. To give an example of what I'm talking about, look at this miniature again:

Enlarge Image

The bases is sand, glued on and painted to look like dirt and grass. A little more glue and some pebbles are sprinkled on top. The water is just brown paint covered by several layers of Future floor polish. The grass around her feet is static grass.

Like I said, most of this stuff isn't necessary for starting painting. You obviously need brushes. You need an X-Acto knife, and you probably need super glue and some sort of palette. I highly recommend some sort of improvised 'handle' like my prescription bottles and a daylight bulb for a lamp. If you have that, you're golden. Get the rest as you need it.

Part of the reason I posted the full list is that a lot of people have a lot of this stuff sitting around the house or in their yard, or can gather it up at the nearest park.
What doesn't kill me makes me stranger.
User avatar
Zaxxon
Forum Moderator
Posts: 28510
Joined: Wed Oct 13, 2004 12:11 am
Location: Surrounded by Mountains

Re: [Miniatures] Painting tips and progress reports (with pi

Post by Zaxxon »

This thread delivers. Anxiously awaiting March so I can join in with a complete lack of skill (but a not-quite-complete lack of knowledge, thanks to you folk).
User avatar
TiLT
Posts: 4435
Joined: Sun Oct 17, 2004 7:01 am
Location: Trondheim, Norway
Contact:

Re: [Miniatures] Painting tips and progress reports (with pi

Post by TiLT »

Zaxxon wrote:This thread delivers. Anxiously awaiting March so I can join in with a complete lack of skill (but a not-quite-complete lack of knowledge, thanks to you folk).
I haven't got the skill either. It's quite daunting documenting my first minis like this, but I try to compensate with research first.
Insert witty comment here.
User avatar
Debris
Posts: 4455
Joined: Thu Oct 14, 2004 8:13 am
Location: Over Dresden at Angels one five

Re: [Miniatures] Painting tips and progress reports (with pi

Post by Debris »

Tilt, I like everything you've done so far, except I'm not a real big fan of quick shade/dip. IMO it washes out the colors instead of adding depth as it's supposed to do. I've found that using black and brown washes enhances the models and the colors so much better, with only a little more effort.

To start, I would use a Sepia wash for anything brown or red, including flesh or wood and then a black wash for everything else. The Games Workshop washes are a lot better than they used to be and I highly recommend them (black = Nuln Oil, brown/sepia is either Seraphim Earthshade or Reikland Fleshshade). Or, you can make your own washes using some acrylic artists inks such as Daler Rowney. They are too strong out of the bottle, but it's easy to mix a wash with a little distilled water, matte medium and a touch of flow aid. This allows you to create a wash where you have control over all of the properties, such as flow rate, pooling and color vibrancy.

Once you get familiar with using washes, you can then go to different colors such as blues, greens and yellows to add even more depth to your models.

The main thing that will quickly get your models looking good is practice, practice, practice. Try several methods and techniques for each group of models that you do and always strive to do something different or better. Soon you'll be producing quality models.
User avatar
TiLT
Posts: 4435
Joined: Sun Oct 17, 2004 7:01 am
Location: Trondheim, Norway
Contact:

Re: [Miniatures] Painting tips and progress reports (with pi

Post by TiLT »

Debris wrote:Tilt, I like everything you've done so far, except I'm not a real big fan of quick shade/dip. IMO it washes out the colors instead of adding depth as it's supposed to do. I've found that using black and brown washes enhances the models and the colors so much better, with only a little more effort.
Well yes, I'm aware of the limitations of quickshade and fully intend to use self-made washes (I believe Reaper paint is ideal for this due to its density) for most models I'm going to spend more time on. I guess it's good that you mention this, as I realize I haven't talked a lot about what choices I have and why I take the ones I do.

The thing about the zombie walkers is that they're supposed to be a dull, unremarkable mass of creatures that shouldn't draw too much attention. That's why I'm using bleak colors and why Quickshade works so well. Of course, using washes would be better, but they take more time. Zombicide (the Abomination level from the Kickstarter) features 60 walkers, 22 runners, 12 fatties, 2 abominations, and 9 survivors. Even if using washes adds only, say, 2 minutes per miniature (which is optimistic), that's still almost 4 hours of additional work in total. This is the entire point of Quickshade: Shading something quickly. It isn't the perfect solution, but it's a compromise.

My plan is to do the walkers using the most basic of painting methods (though I might experiment a little with dry brushing for highlights tonight. We'll see.), the runners with slightly brighter colors and more detail, the fatties with some highlights, and the abomination at decent quality. All of them will receive Quickshade to give them a uniform look as enemies. The heroes I'm planning to do "properly" without using Quickshade. I might try wet blending with them, but I haven't decided yet. I want to build a bit more experience before I throw myself at them.
Insert witty comment here.
User avatar
raydude
Posts: 4030
Joined: Mon Oct 18, 2004 9:22 am

Re: [Miniatures] Painting tips and progress reports (with pi

Post by raydude »

TiLT wrote:
Debris wrote:Tilt, I like everything you've done so far, except I'm not a real big fan of quick shade/dip. IMO it washes out the colors instead of adding depth as it's supposed to do. I've found that using black and brown washes enhances the models and the colors so much better, with only a little more effort.
Well yes, I'm aware of the limitations of quickshade and fully intend to use self-made washes (I believe Reaper paint is ideal for this due to its density) for most models I'm going to spend more time on. I guess it's good that you mention this, as I realize I haven't talked a lot about what choices I have and why I take the ones I do.
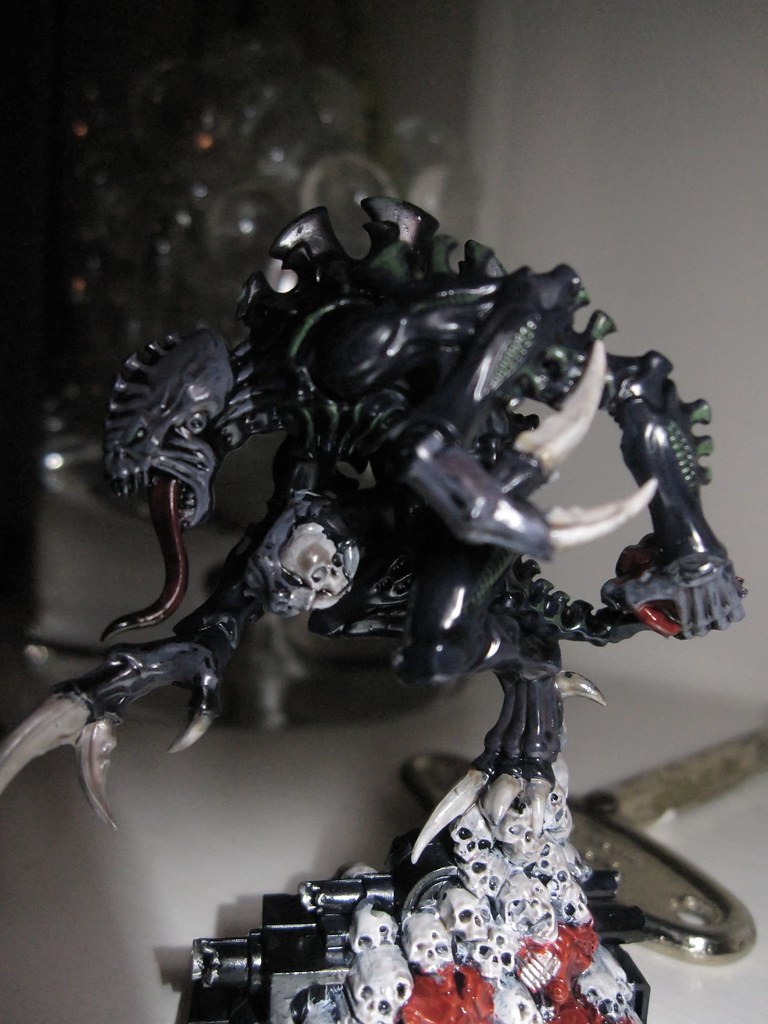
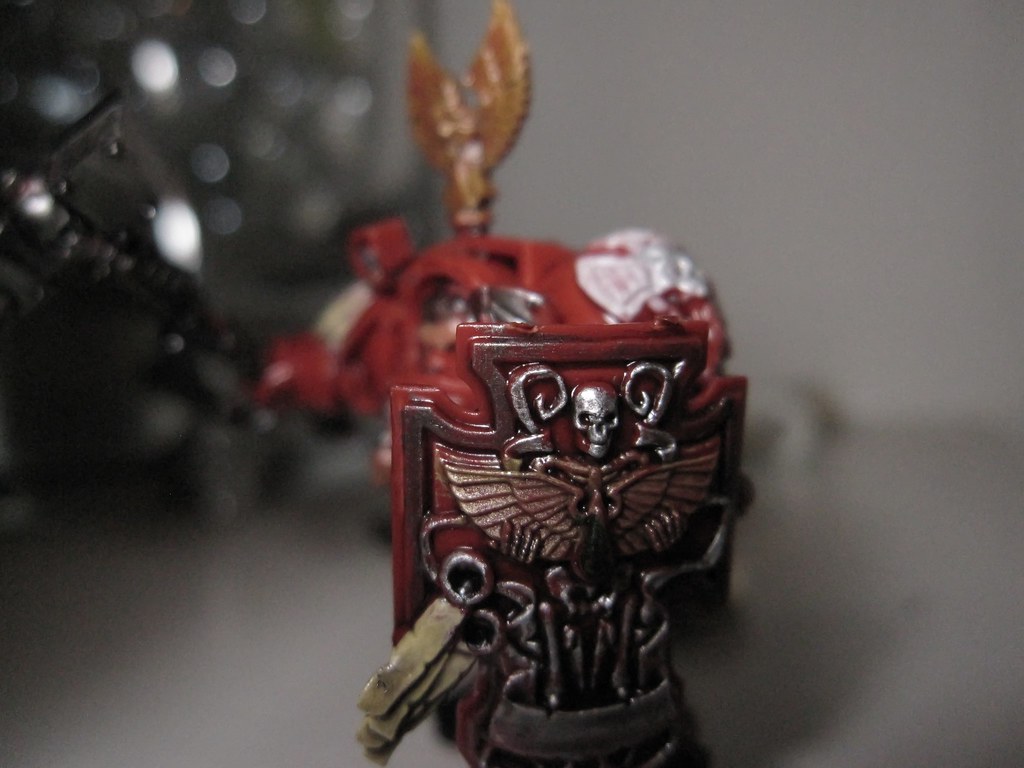
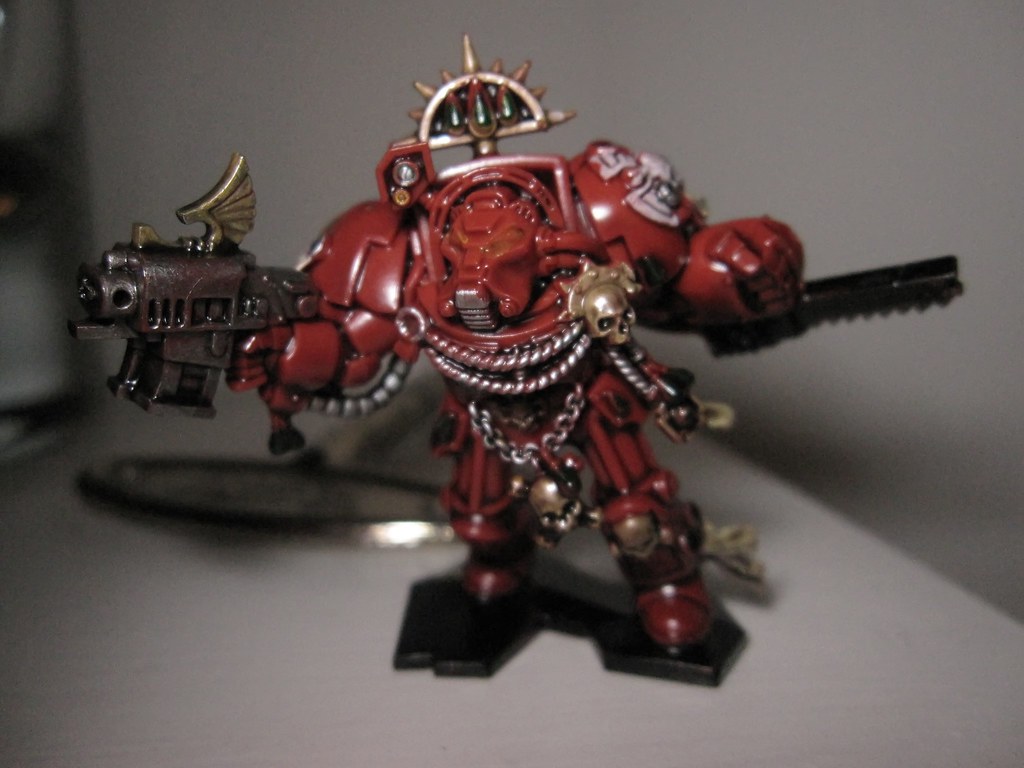
I'm just a rank amateur myself and only started painting minis when I bought the Space Hulk 3rd edition set. I looked up the quickshade thing and decided to try it as the last step after I painted my Space Marines and Genestealers. For my first dip I was a bit alarmed at how dark the mini became so I took a thick brush and wiped off as much as I could. I tried to wipe off a lot and found that it resulted in the dip only staying in the crevices and darkening the minis just slightly. And for Space Marines and Genestealers that darker tone seemed to work:

Genestealer:
Image

Space Marine Shield:
Image

Come Get Some!
Image
User avatar
Boudreaux
Posts: 2816
Joined: Fri Oct 15, 2004 12:18 am
Location: St. Louis

Re: [Miniatures] Painting tips and progress reports (with pi

Post by Boudreaux »

Blackhawk wrote:Basic tabletop/army painting: This is the most basic painting technique. The goal here is to make figures look right, but not perfect. It is the opposite extreme from display painting. The idea is that you might have to paint dozens of characters to fill out a wargaming army, the relatively low-quality minis that came with a board game, or dozens of generic monsters for a roleplaying session. You want them to look good, but you can't spend ten hours on each piece. Basic colors, some simple shading and highlighting and you're good to go. It is a fast way to get lots of miniatures on the table quickly.

Example of my own painting using this style. The rank and file goblins are painted this way:

Image
Ha! I would not call this "the most basic painting technique", as these look really, really good. In fact, I don't see a lot of difference between this and your "character painting" examples.

I would add a couple more levels below this which would consist of "Hey! Painted minis!" and "Well, they're not plain plastic".

I've painted minis for many of my board games, but they are quite often fairly low-quality models. There simply isn't enough detail in the miniature sculpt to utilize some of these techniques like shading and highlighting. But, having painted minis really enhances the look of the game - especially when the game boards are really well-illustrated with lots of detail and color. I painted my miniatures from Last Night on Earth as my first project years ago, and I didn't utilize anything beyond a basecoat - no wash, no highlighting, just color and a clear coat.

I'm working on adding some of these techniques the more I do, and starting to get the hang of it. I'll be curious to see how the Reaper Bones minis from the Kickstarter compare detail-wise to some of the board game minis I've painted so far.
User avatar
TiLT
Posts: 4435
Joined: Sun Oct 17, 2004 7:01 am
Location: Trondheim, Norway
Contact:

Re: [Miniatures] Painting tips and progress reports (with pi

Post by TiLT »

Boudreaux wrote:I'm working on adding some of these techniques the more I do, and starting to get the hang of it. I'll be curious to see how the Reaper Bones minis from the Kickstarter compare detail-wise to some of the board game minis I've painted so far.
They are impressively detailed, so they'll put just about anything you already have to shame.
Insert witty comment here.
User avatar
Blackhawk
Posts: 46010
Joined: Tue Oct 12, 2004 9:48 pm
Location: Southwest Indiana

Re: [Miniatures] Painting tips and progress reports (with pi

Post by Blackhawk »

My 'progress report' miniature is going to be the Bones gnoll, so it should give a good look at the line.
What doesn't kill me makes me stranger.
User avatar
TiLT
Posts: 4435
Joined: Sun Oct 17, 2004 7:01 am
Location: Trondheim, Norway
Contact:

Re: [Miniatures] Painting tips and progress reports (with pi

Post by TiLT »

I let the walkers rest tonight to make absolutely sure the quickshade is dry, and instead went ahead and painted half of my fatties (6). It took me about 3 hours from start to shading, which I feel is far too long. I guess it can't be helped when we're talking about fairly detailed miniatures wearing clothes though. It's not like a Space Marine or a Genestealer who are predominantly one color.

I discovered that my cell phone can take HDR pictures, which improved lighting considerably. I've also done color adjustments to today's pics, so you'll be better able to see exactly what was done. First of all, here's an updated picture of the now dry or nearly dry walkers:
Enlarge Image
That's perhaps a little too bright, but beggars can't be choosers.

The fatties started out with a white primer, which I showed you yesterday. The result was that I got away with only one layer of basecoating. I also didn't thin the paint with water today, except to restore some wetness to it when it started to dry. I also used a flow improver to see the effects and gain some of the advantages of thinning without actually, you know, thinning the paint. Here's the result after ages of basecoating:
Enlarge Image

Notice that I used bright colors today as an experiment in the opposite direction of what I did yesterday. Bright colors on white primer... I wonder how the quickshade will look. Let's see:
Enlarge Image

Not bad. Not bad at all. See how the quickshade both dirties up my zombies and brings out their details. You can even see the zippers in their overalls, which you can't do in the basecoat picture. With some matte varnish, these will look very decent indeed. I'm very pleased with today's results. :)
Last edited by TiLT on Fri Sep 14, 2012 7:12 am, edited 1 time in total.
Insert witty comment here.
User avatar
raydude
Posts: 4030
Joined: Mon Oct 18, 2004 9:22 am

Re: [Miniatures] Painting tips and progress reports (with pi

Post by raydude »

TiLT wrote: Notice that I used bright colors today as an experiment in the opposite direction of what I did yesterday. Bright colors on white primer... I wonder how the quickshade will look. Let's see:
ey look like after quickshading: (also added some blood between the two pictures)
Enlarge Image

Not bad. Not bad at all. See how the quickshade both dirties up my zombies and brings out their details. You can even see the zippers in their overalls, which you can't do in the basecoat picture. With some matte varnish, these will look very decent indeed. I'm very pleased with today's results. :)
Looks pretty good to my untrained eye. Good enough for playing the game with that's for sure. Another thing I like about quickshade is that it tends to help cover up little mistakes. In fact, that's where I first read about it, was in a quick and dirty guide to painting a whole mess of zombie minis. The author basically said to not worry about little blemishes and to not focus on getting all the paint in exactly the right place. Quickshade would help cover it up and would help make the zombies more putrid and grungy looking. Sure enough it does the trick here.

Don't get me wrong, washes are great. I do washes on my plastic models. But for games with lots of minis I prefer minimizing the painting time in favor of the playing time.
User avatar
Isgrimnur
Posts: 84864
Joined: Sun Oct 15, 2006 12:29 am
Location: Chookity pok
Contact:

Re: [Miniatures] Painting tips and progress reports (with pi

Post by Isgrimnur »

Painting is for when you can't get a game together. :)
It's almost as if people are the problem.
User avatar
SpaceLord
Posts: 7242
Joined: Tue Dec 28, 2004 1:51 pm
Location: Lost in Time and Space
Contact:

Re: [Miniatures] Painting tips and progress reports (with pi

Post by SpaceLord »

It's an Undead Chorus Line!
They're going to send you back to mother in a cardboard box...
User avatar
Debris
Posts: 4455
Joined: Thu Oct 14, 2004 8:13 am
Location: Over Dresden at Angels one five

Re: [Miniatures] Painting tips and progress reports (with pi

Post by Debris »

Sorry, Tilt, I didn't mean to come off as a dick by criticizing your work. Your methods are just fine and if you're happy with the results, don't give guys like me a second thought.

On a positive note, I do like the fat zombies and their color scheme. Nothing like zombies in wife-beaters!
User avatar
coopasonic
Posts: 21141
Joined: Fri Mar 04, 2005 11:43 pm
Location: Dallas-ish

Re: [Miniatures] Painting tips and progress reports (with pi

Post by coopasonic »

Isgrimnur wrote:Painting is for when you can't get a game together. :)
I guess I should get serious about painting then. :P

Tilt, the Fatties look awesome. I'd love to have mine look like that. I think the brighter colors look much better when it is all said and done. The original ones you did are just too muted for my taste. Sure, they should be grungy, but I think there's a balance. On the other hand if you make the runners stand out from the walkers, it will be easier to tell the difference in the game, which can be a bit difficult with the unpainted figures.
-Coop
Black Lives Matter
User avatar
Blackhawk
Posts: 46010
Joined: Tue Oct 12, 2004 9:48 pm
Location: Southwest Indiana

Re: [Miniatures] Painting tips and progress reports (with pi

Post by Blackhawk »

Yeah, the quick-dip looks great for getting minis on the table ('army painting'), although it wouldn't work for all types of characters (I can't see it working for High Elves, for instance.) Just the basecoat and the dip makes them look better than the pre-painted stuff you can buy.
What doesn't kill me makes me stranger.
User avatar
Boudreaux
Posts: 2816
Joined: Fri Oct 15, 2004 12:18 am
Location: St. Louis

Re: [Miniatures] Painting tips and progress reports (with pi

Post by Boudreaux »

So here's what I'm working on at the moment. The four hunters from FFG's Fury of Dracula:

Enlarge Image

Mostly as something to do until the Bones minis start showing up. I've always meant to paint these, but never got around to it until now. All I've done so far is some basecoating - the skin tones, filled in some of the clothing - and a little bit of highlighting and shadowing. I got fairly good results with the red jacket guy on the far right, I like the shading on his coat and pants. Mina's blue dress is okay, it doesn't look as good as I'd like up close. Van Helsing's overcoat started dark and I went pretty heavy on the highlighting, mostly just to see how it worked.

So far so good.
User avatar
TiLT
Posts: 4435
Joined: Sun Oct 17, 2004 7:01 am
Location: Trondheim, Norway
Contact:

Re: [Miniatures] Painting tips and progress reports (with pi

Post by TiLT »

coopasonic wrote:Tilt, the Fatties look awesome. I'd love to have mine look like that. I think the brighter colors look much better when it is all said and done.
Yeah, I did admit that I was surprised by the darkness of the quickshade and that I should have used brighter colors than I did. For the five original walkers I'll compensate with some quick dry brushing, I think. For future walkers I'll just use brighter colors right away.
Insert witty comment here.
User avatar
YellowKing
Posts: 31133
Joined: Wed Oct 13, 2004 2:02 pm

Re: [Miniatures] Painting tips and progress reports (with pi

Post by YellowKing »

I think I'm going to strip my Minotaur (that sounds NSFW) and start over. :P

I'm realizing the mistakes I made at the beginning are just going to compile, and I'm not happy with it right now even though I'm only at the base coating stage. I think what happened is that I didn't get an even coating with the primer (since I didn't know when painting the Bones figures you shouldn't thin the primer with water). This led to an uneven coat of the base colors. This in turn forced me to lay the paint on thicker, and now his fur just looks like a big murky mess.

I've only got a couple of hours invested in him, so better to start over now than to keep trying to patch a poor foundation.
User avatar
TiLT
Posts: 4435
Joined: Sun Oct 17, 2004 7:01 am
Location: Trondheim, Norway
Contact:

Re: [Miniatures] Painting tips and progress reports (with pi

Post by TiLT »

YellowKing wrote:I think what happened is that I didn't get an even coating with the primer (since I didn't know when painting the Bones figures you shouldn't thin the primer with water).
Say what? You thin your primer? I can't say I've ever heard of anyone doing that, but then again, these days spray primer is the most common type. I can't imagine you'd get good results on any kind of miniature using thinned primer, Bones or not.
Insert witty comment here.
User avatar
Blackhawk
Posts: 46010
Joined: Tue Oct 12, 2004 9:48 pm
Location: Southwest Indiana

Re: [Miniatures] Painting tips and progress reports (with pi

Post by Blackhawk »

Let's get on with our gnoll, then.

I plan to do him step by step as a sort of 'how to'. He's ideal, as much of the recent inspiration around here was brought on by Reaper's Bones Kickstarter, and this gnoll is one of the already released bones. I didn't think about doing it this way until I had already started preparing the piece, to the first bit here is going to be a little scarce on photos.

Anyway, moving on. The first thing to do when working on a new miniature is to plan, and most of the time (for me, at least) that means research. Here's what we have, straight out of the package:
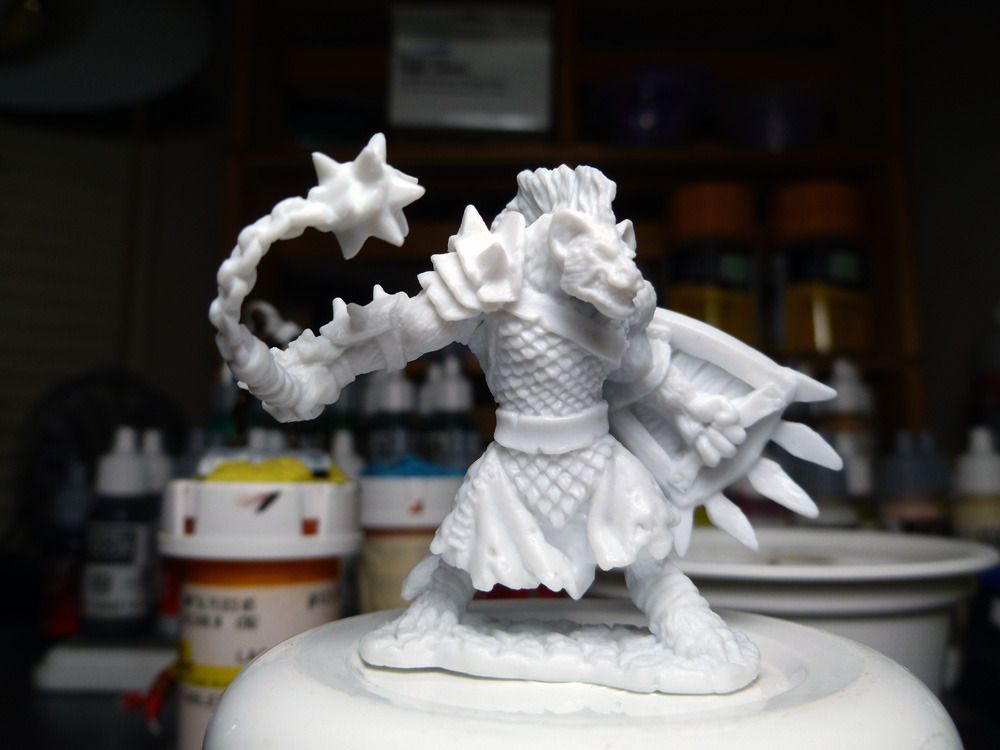
Enlarge Image

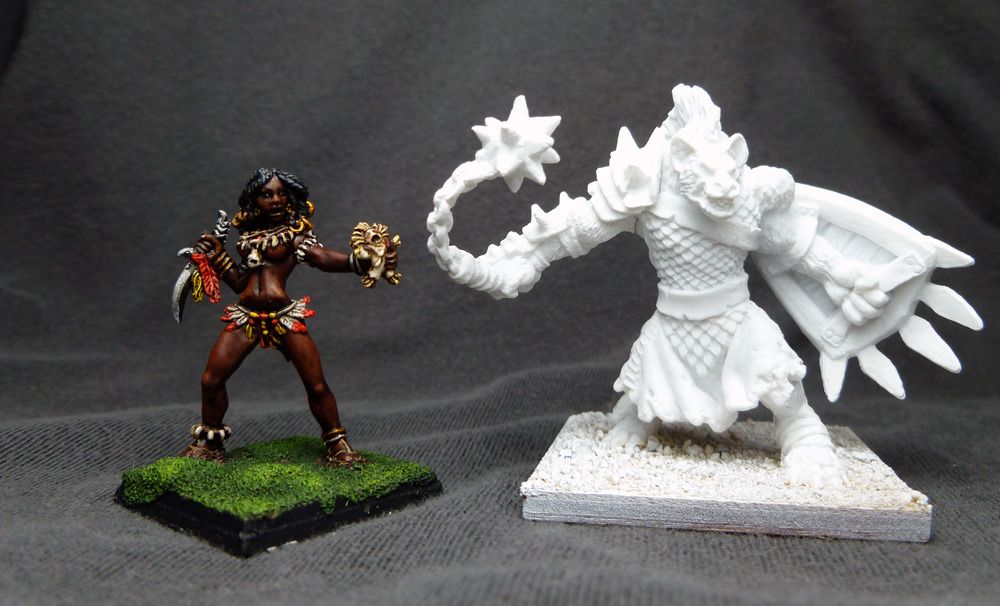
We know it is a gnoll. Not only that, the miniature was originally sculpted for Warlord, Reaper's miniatures game. He is Boneflayer, a gnoll sergeant in the Kargir faction. That is relevant to me, as I'm working on a Kargir army. That also means he's a character, and I'll paint him as such, with more detail than I would a regular rank and file miniature. The Warlord: Savage North rulebook says this about him:
Weathered from years of wandering the lowlands, the gnolls produce leaders who excel at raiding and smashing small groups of enemy soldiers. Any gnoll is a fierce opponent, and the ones who lead them are fearless. Crashing into enemy ranks, Boneflayer uses his great mace to deal death to all within reach. Boneflayer will attack any enemy that is near, regardless or rank or value. He is not happy unless he slays more of the enemy than anyone else around him.
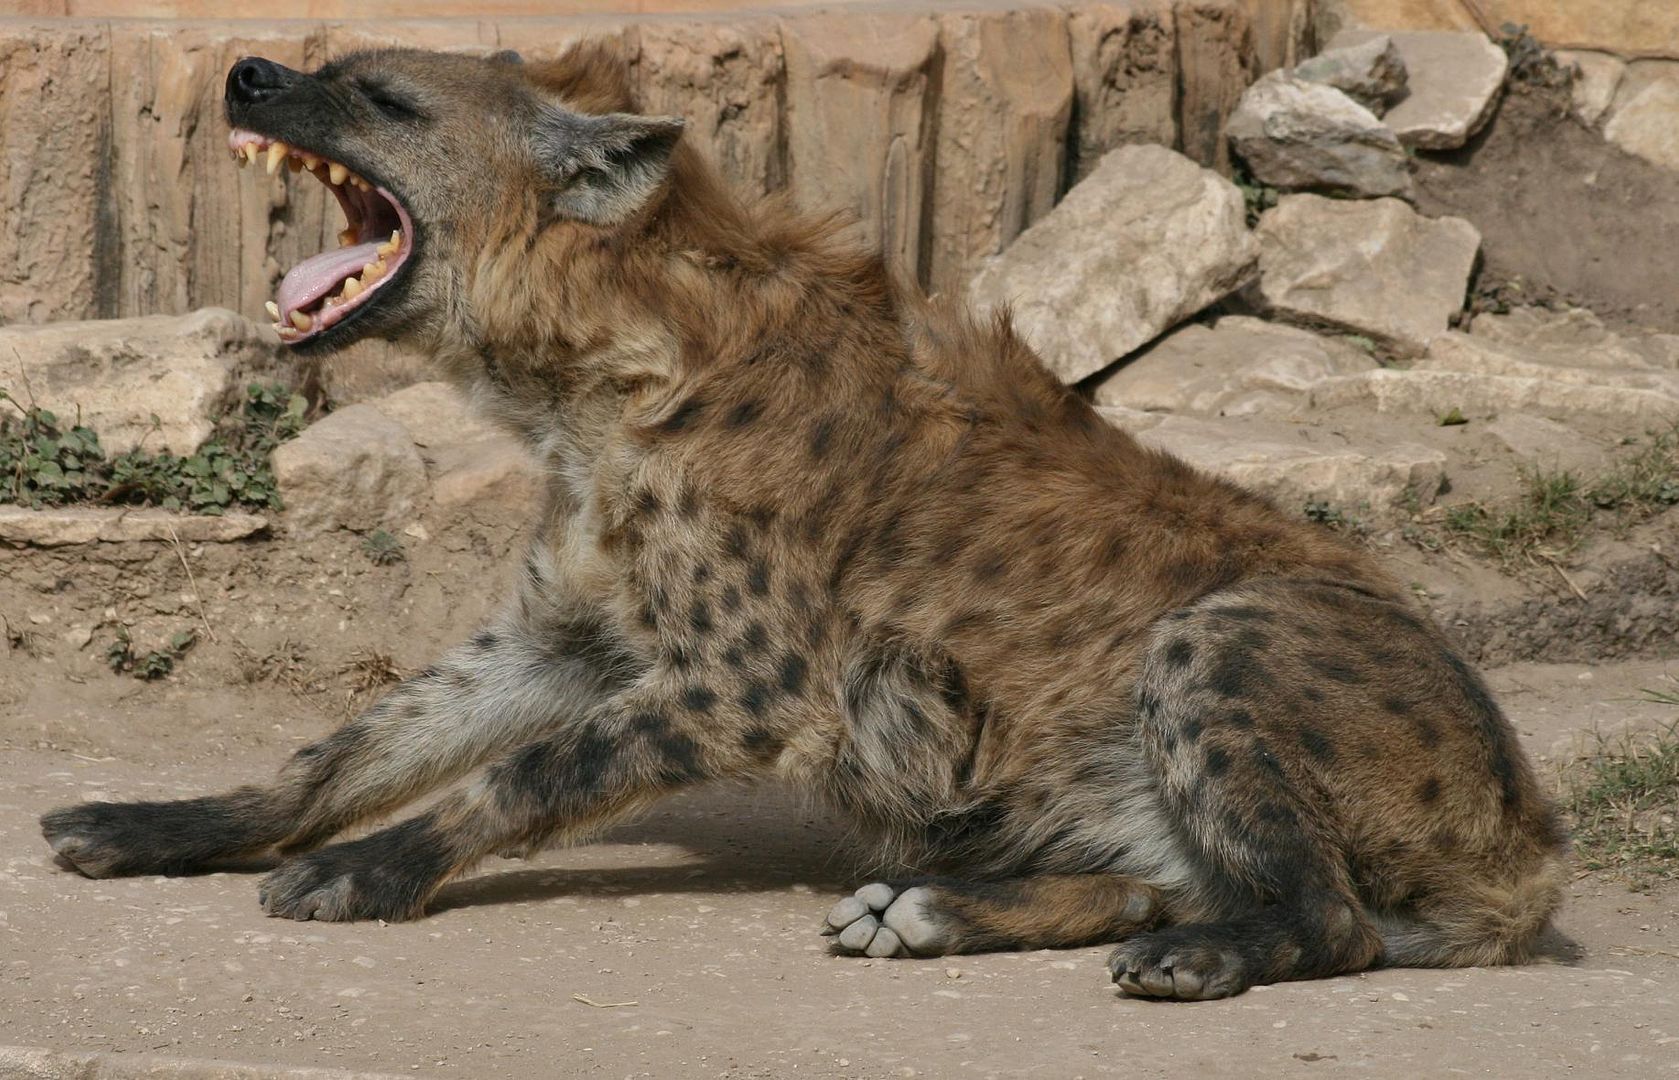
That doesn't point out any specific colors or decorations, but it does give us a general feel for the character. He should come across as brutal and bloodthirsty. Gnolls, in most fantasy (including Warlord), are based on the idea of a humanoid hyena. That suits me, and I'll work from that. The next thing I usually do is collect resources. I've got enough fantasy art, RPG books, and screenshots of game moments that caught my attention to give quite a bit of inspiration, and Google Images is invaluable. I'll search for both 'gnoll' and 'hyena'. (You really don't want to know the kind of searches I did to make my zombies look right.)

Gnoll got 187,000 hits, hyena 6.3 million, so I'll narrow it down to those that really fit what I am looking for. Here is what I got (plus a few others):
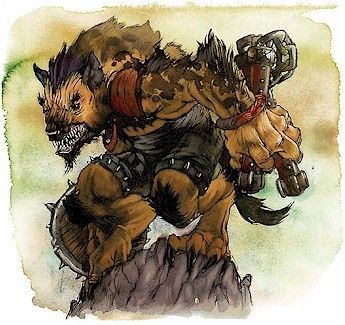
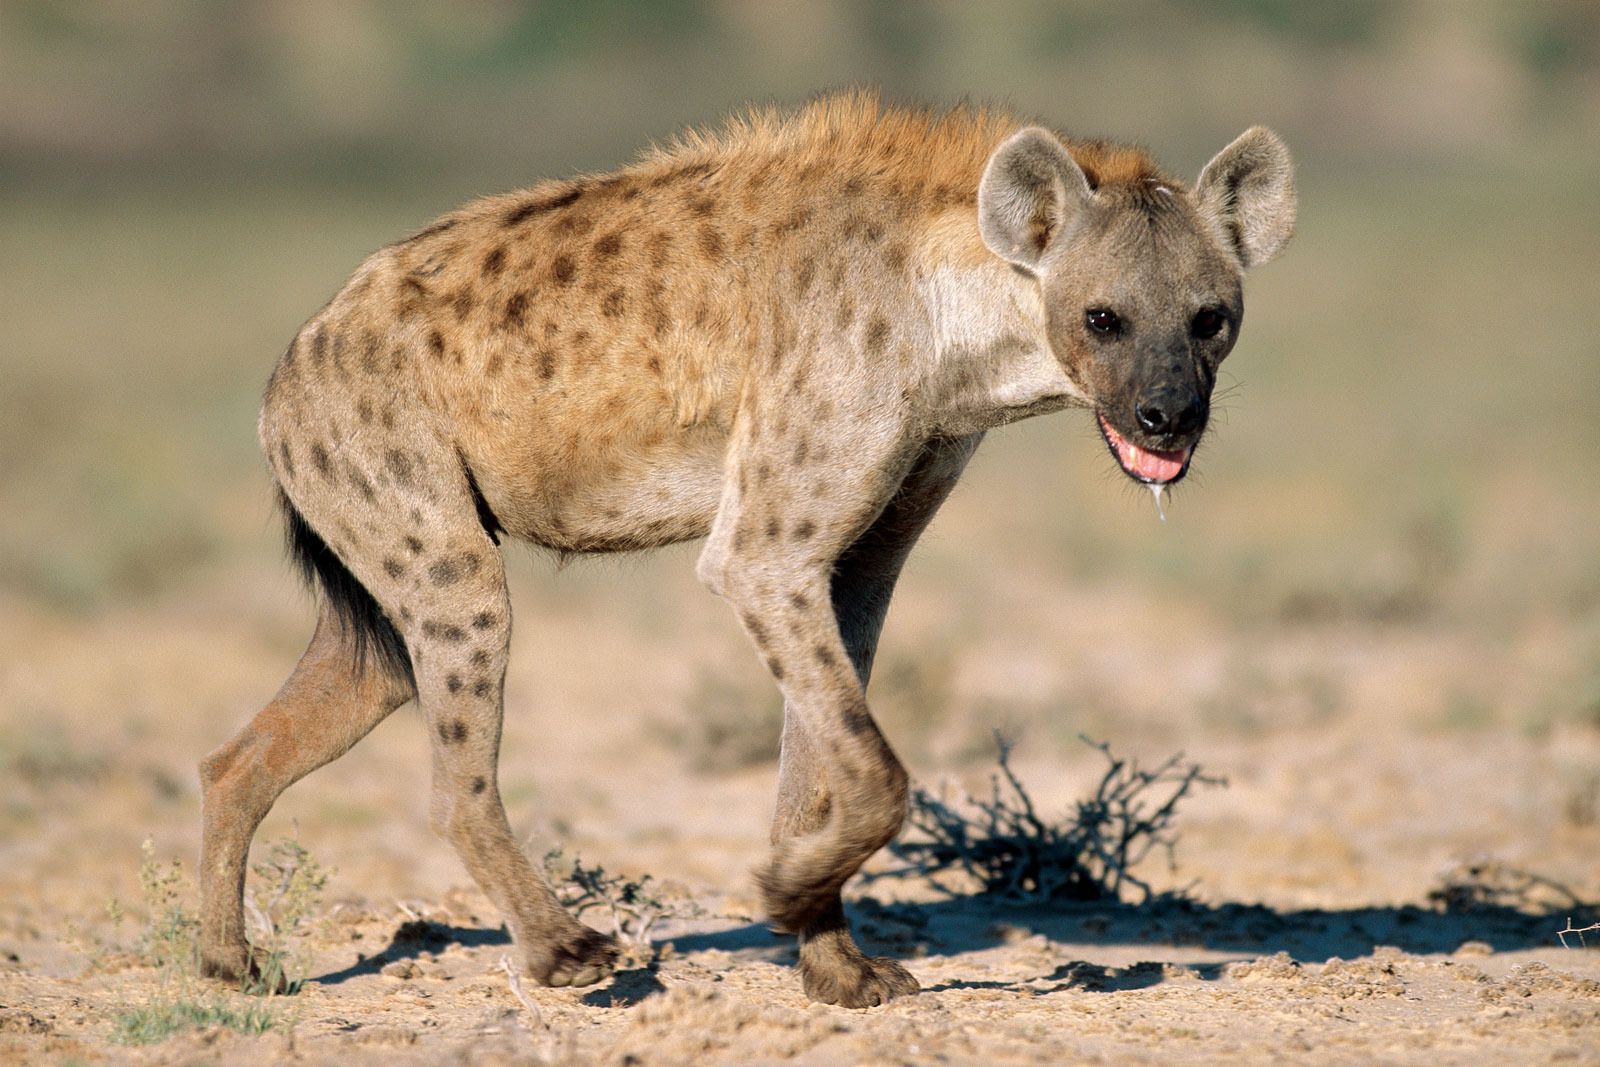
ImageEnlarge ImageEnlarge Image

The two hyena shots give me a good idea of what colors I'm looking at. Light cream on the bottom, trendy toward a tannish-yellow, almost orange as it moves up the body, black-brown spots, dark on the face. The gnoll image caught my attention, as I love how the black around his muzzle really brings out the teeth. Now, research like this isn't necessary on every piece. For some pieces I've found a dozen or more images, for others, none. It is just part of how I like to approach it.

Anyway, now I have a plan. I know what the miniature represents, I know what the traditional look is (and this time, I want to go with that), and I have some references for the look. Next up is preparing the miniature to paint.

Stage 1: Cleaning

The first thing to do is the clean up the miniature itself. To get started, you need to remove any flash and mold lines. This is the tiny imperfections that appear around most molded objects, normally a thin line (mold line) where the two halves of the mold meet, but sometimes also areas where the metal or plastic overflowed the mold a little (flash.) Here is an example of a mold line, stolen from the internet. Flash look like an extraneous bit of metal stuck somewhere, like a little growth.
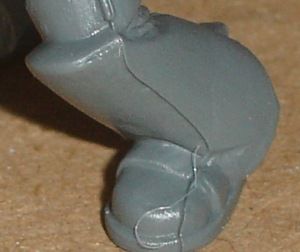
Image

Cleaning the mold line is fairly easy. For metal and plastic miniatures, most of it can be cleaned by simply scraping it with the edge of an X-Acto knife. Thick areas can be cut away or sanded. With Bones, the material is too soft, and scraping and filing don't work well. Instead, very carefully slice the line away, being careful not to cut away the detail in the process. Luckily, Bones seem to have the smallest and least noticeable mold lines I've ever seen in miniatures.

Stage 2: Washing

Miniature molds are usually given a dusting of some sort of release compound to prevent them from sticking inside the mold. Reaper metal minis, for instance, use a dusting of talc. Others use an oil. Furthermore, they're handled by people with hot, sweaty hands while being made, sorted, packaged (and by you when you open them up.) Both release compounds and natural oils can prevent paint from sticking and can result in an uneven paint job.

The next job, then, is to wash the miniature. It isn't hard to get this stuff off. I just get a bowl of very warm water and some Ivory dish soap, let them soak in it for a few minutes, then use a soft bristled toothbrush to gently scrub the whole piece. When you're done, rinse thoroughly with warm or hot water and set them aside to dry for a few hours. That's it.

Tip 1: For the reasons stated above, always wash your hands with soap and hot water before handling your miniatures, including painting them. You don't want to add new oils. This goes quintuple for freshly applied hand lotion, sunscreen, or personal lubricant. ;)

Tip 2: Bones miniatures are PVC plastic, and are softened in high temperatures. Take this into account when you're washing them. As an aside, you can take advantage of this to fix an out of alignment weapon or to tweak a pose. Dip the Bones in hot (not quite boiling) water for twenty or thirty seconds, hold it in the position you want it to hold, then - still holding it in position - dip it in ice water to cool it.

Tip 3: More of a warning, here. Set aside a special bowl for washing miniatures - I use an old plastic coffee container. With Bones and plastic miniatures it likely doesn't matter, but note that most miniatures made prior to the early 90s were made of pure lead. You don't want that in Junior's Fruit Loops. Likewise, don't use a toothbrush you plan to use on your teeth.


Stage 3: Assembly

This step is an important one. Unfortunately, I don't have any multi-part miniatures ready to go right now, so I can't really post a how-to. Instead, I'll link to this guide, which seems fairly decent. Some quick notes: For assembling plastic or Bones, stick with super glue. For metal, super glue doesn't bond well - use a two-part epoxy. For heavy pieces, consider drilling and pinning.

Stage 4: Basing.

Note the original photo of the gnoll up there - just like all the other Bones, he has a built in 'broccoli' base, a lump of shaped plastic. Bases like this are fairly common. If you just plan on roleplaying with them and aren't dealing with rules that specify base size or shape, then you're fine leaving them like they are. Here is a piece I painted years and years ago that has a painted broccoli base:
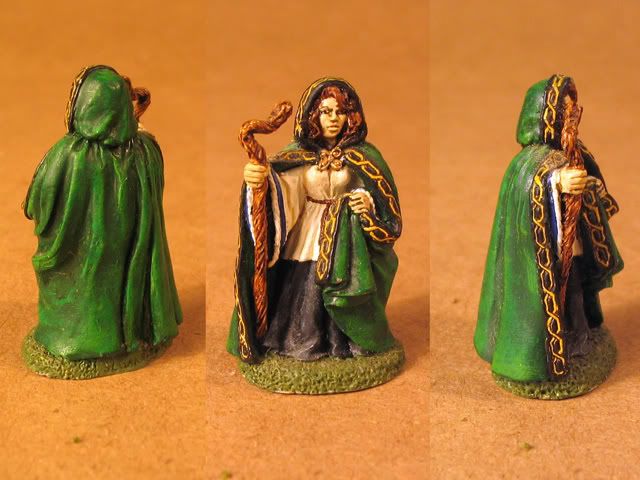
Image

Many miniatures come with a slotted or 'slotta' (old GW term) base. These bases have a long slot in them, and the miniature has a narrow strip under the feet that fits in the base. A drop of super glue is fine for any material on these, although you should do a dry test to make sure they fit in before applying the glue. If there are gaps, they can be closed off with a little bit of Milliput/green stuff, or if they're small, later on with glue and sand. The woman with the crossbow I posted earlier has a slotted base. Another example of a slotted base:
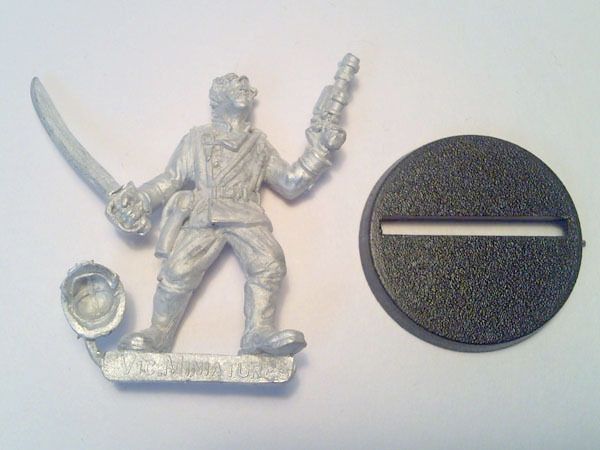
Image

Since I plan to use Boneflayer here for playing Warlord, I have to follow Warlord's rules, which specify base size and shape. You can also re-base miniatures just to give yourself a working surface to make a more elaborate base. Boneflayer uses a 'large' base, which means a 1 1/2" square. I looked at options for basing Bones, and the cheapest place I found was Litko, which offers ultra-fine plywood bases for a small fraction of the cost the plastic bases cost elsewhere. 1" Plastic bases: ~$8 for 20. 1" Litko bases: $11.99 for 100. They do every imaginable size, although they're slow, as they cut them to order. I've never used wooden bases before, so this will be a new experience for me, too, but I have some 1.5" pieces here to test, and I'm very happy with what I've seen so far. Anyway, on to basing Boneflayer.

First, remove him from his broccoli base. I did this very carefully with an X-Acto knife. I started at the claws to ensure the I cut under them, then simply pushed the knife straight back. It sliced very, very easily.
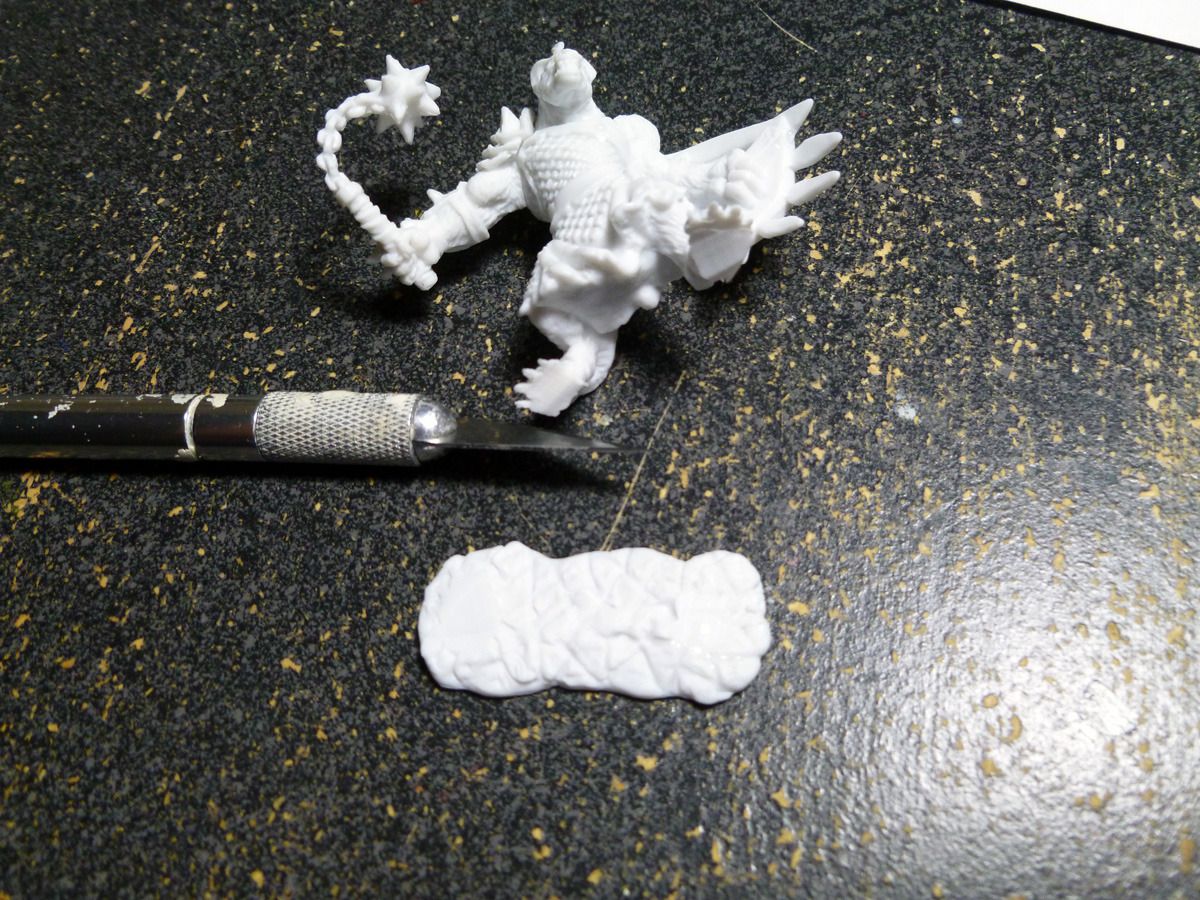
Enlarge Image

Second, I drilled each foot. You could probably glue them directly to the base (especially the wood bases), but since I already have the tools sitting here, I decided it couldn't hurt to give them the extra support. Line up the drill carefully so that you are drilling into solid plastic and not just through the top of the foot. The hand drill worked extremely well on the Bones plastic - don't use a dremel for these things. You'll drill the poor gnoll in half before you realize it.
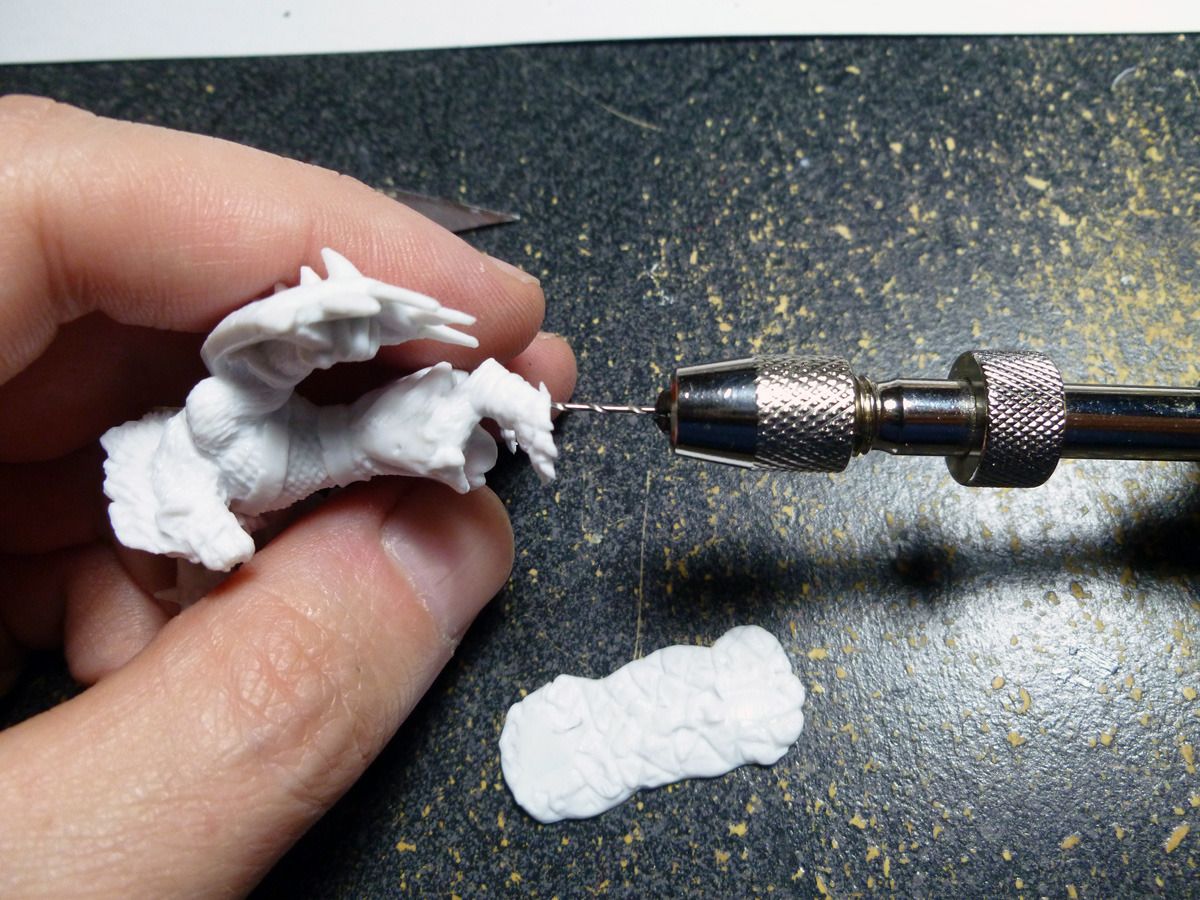
Enlarge Image

Next, insert a rod into each hole with a tiny drop of super glue:
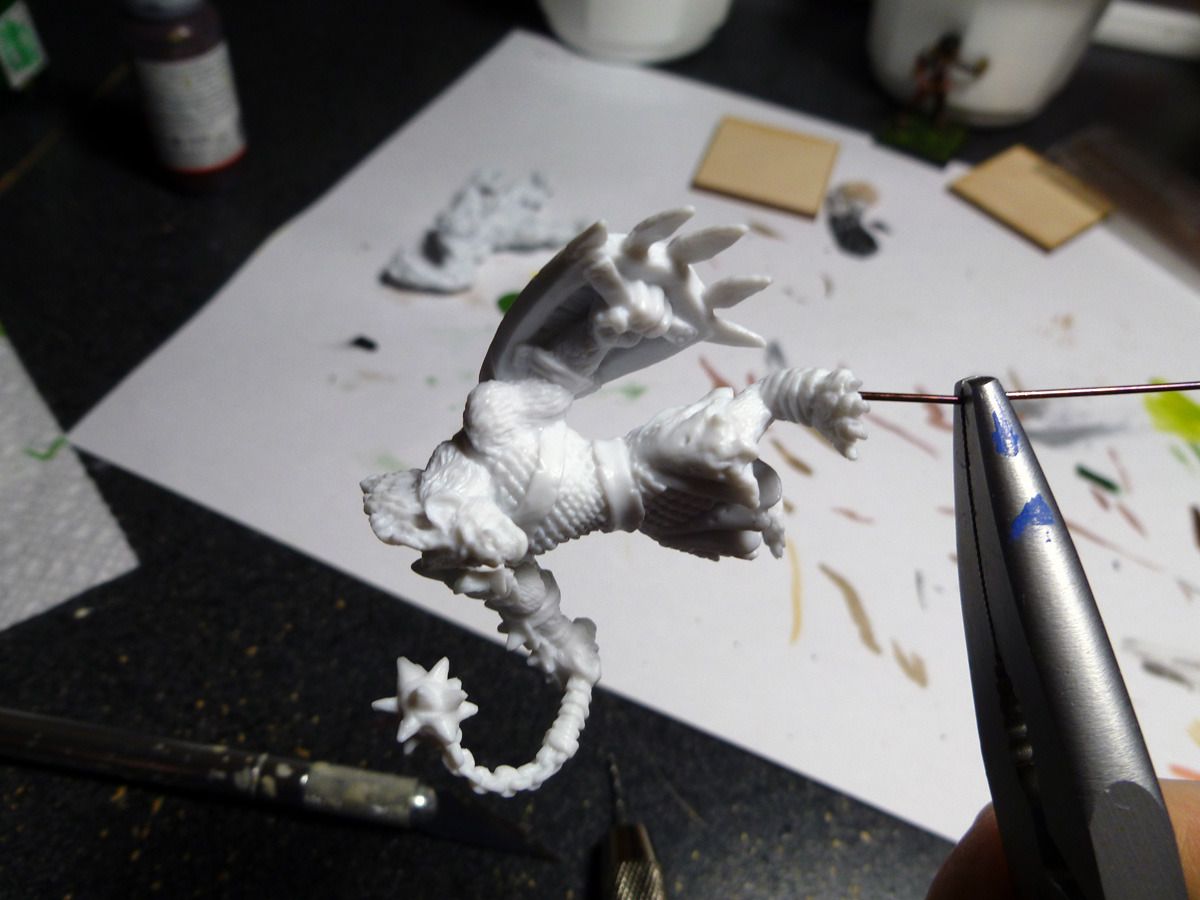
Enlarge Image

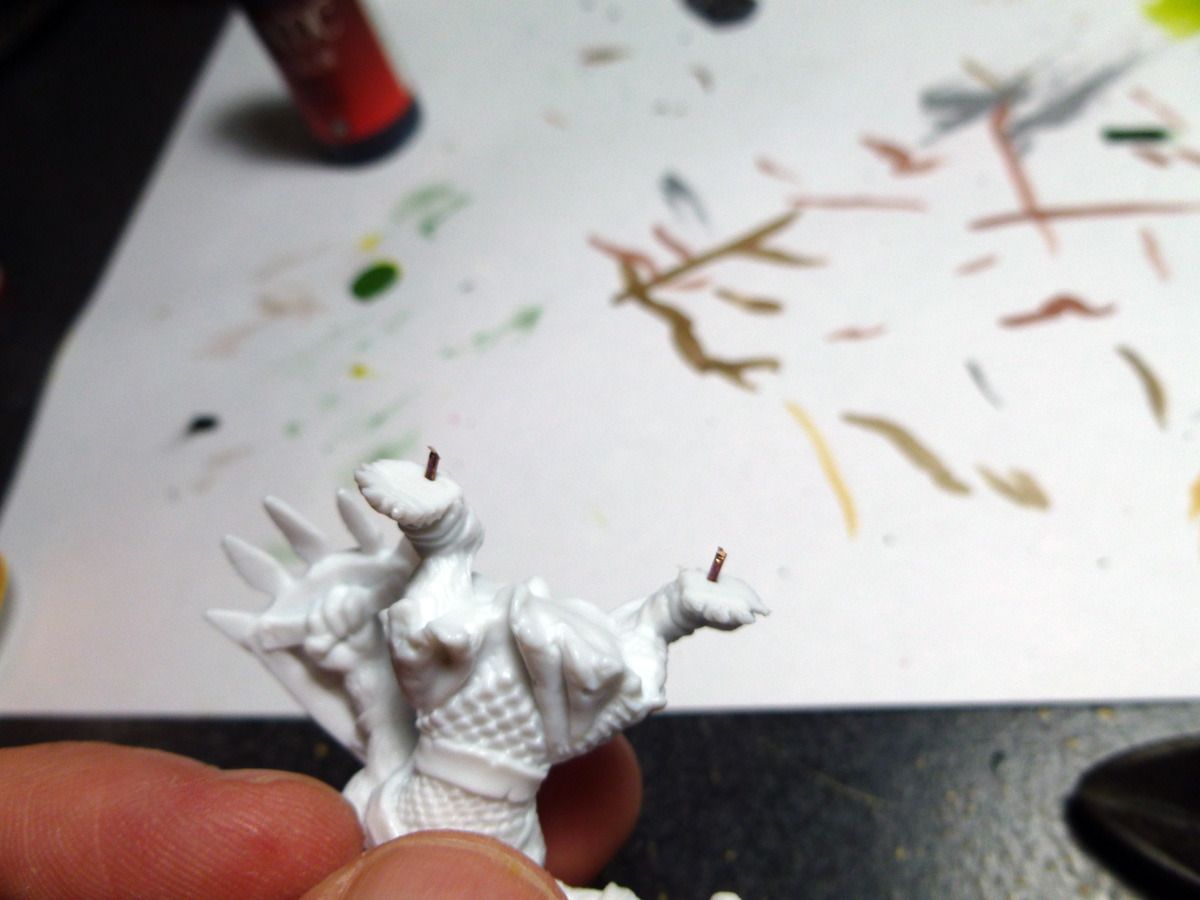
Cut the rods to length. The bases are 3mm thick, so cut the rods a little shorter than that.
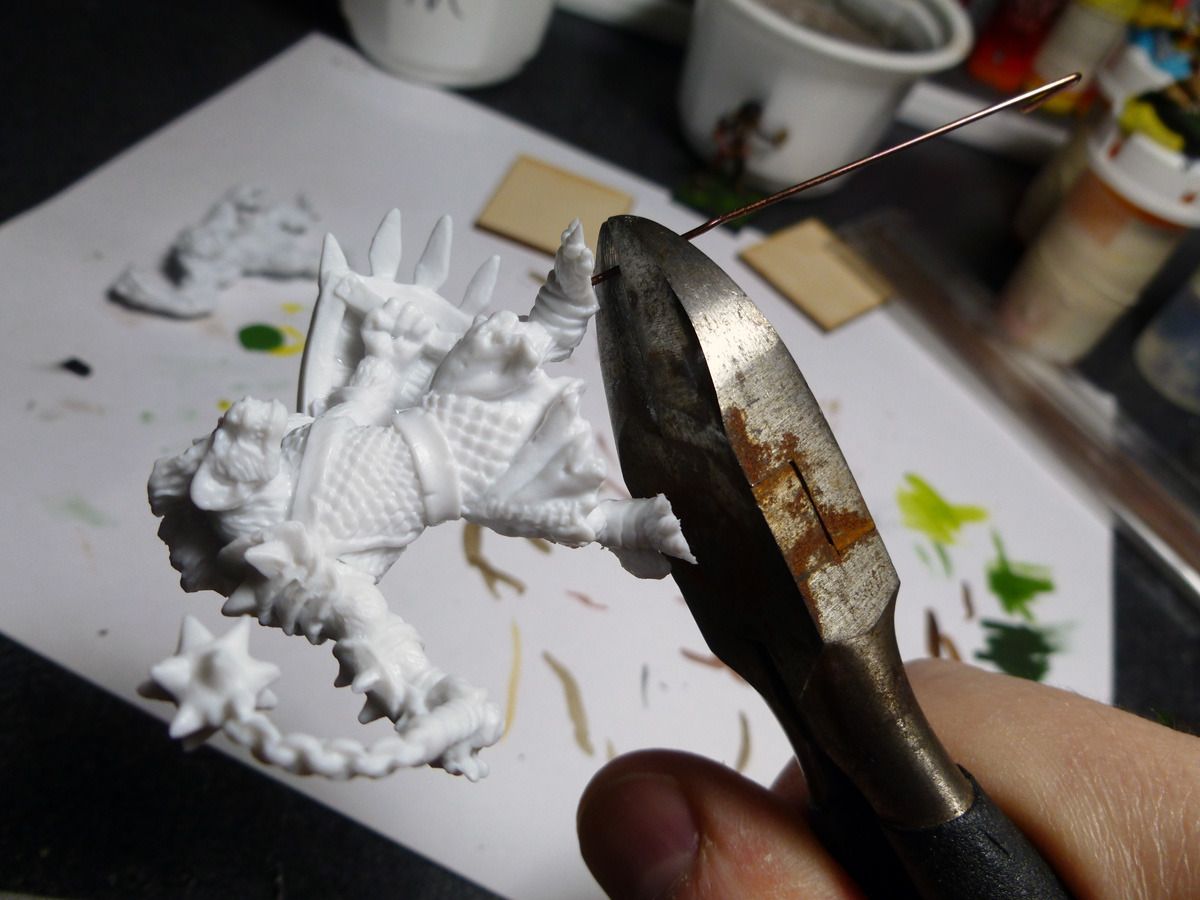
Enlarge Image

Enlarge Image

Next, figure out exactly how you want him to stand on the base. Facing 90 degrees toward the front rarely looks good, but you don't want it to be ambiguous as to which side is the front. Touch each pin lightly to some paint, and set him on the base to mark it.
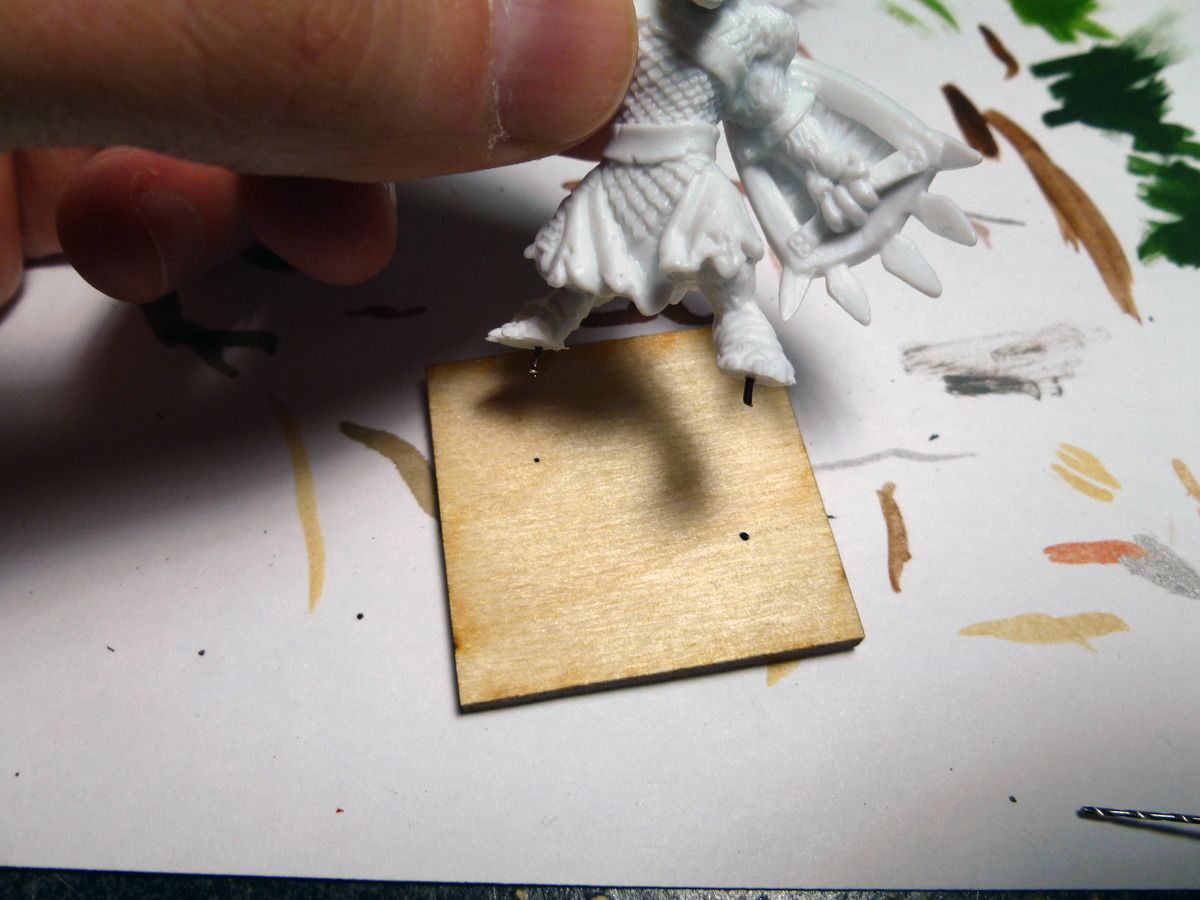
Enlarge Image

Drill holes where the paint marks were.
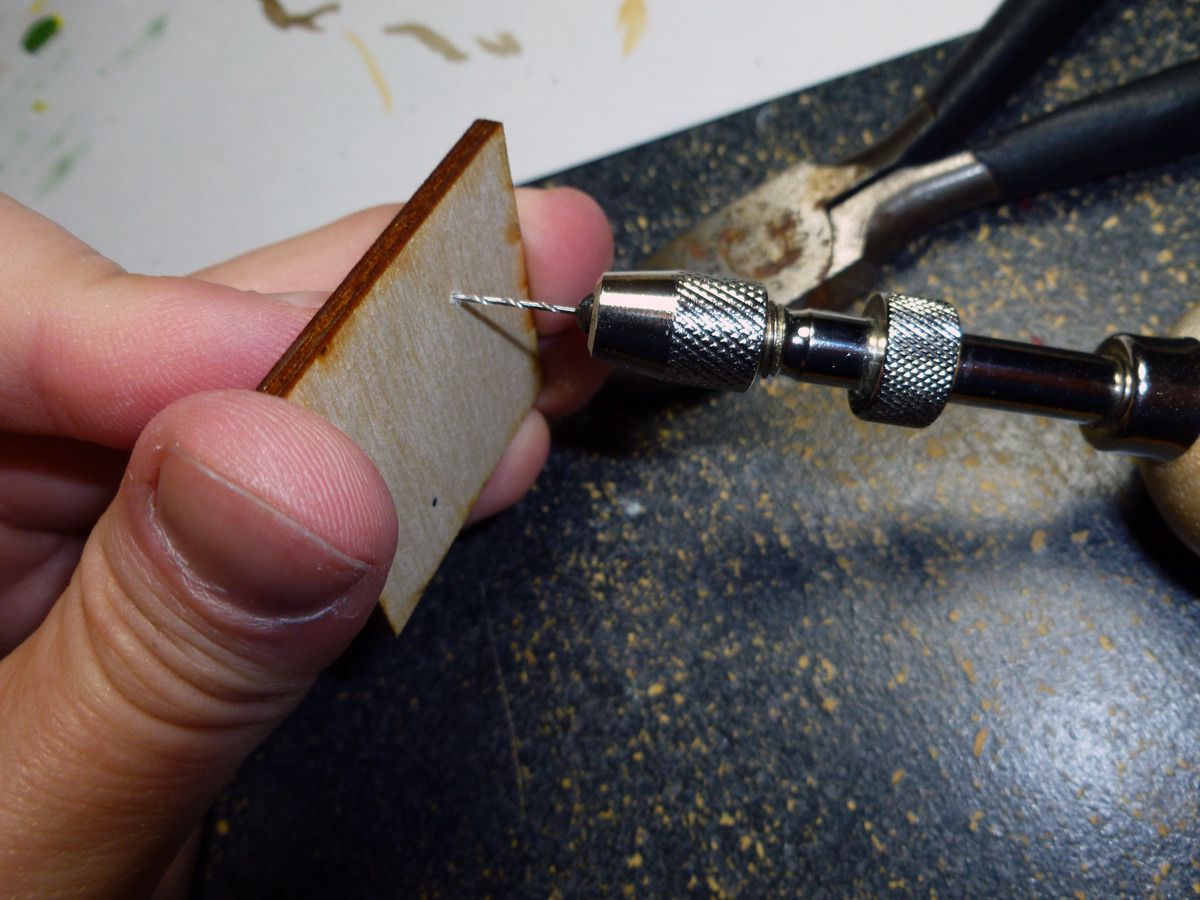
Enlarge Image

Next, apply a tiny drop of superglue on tips of the rods, plus a little on the soles of his feet to hold him in place. Stick rod A in hole B. Press firmly.
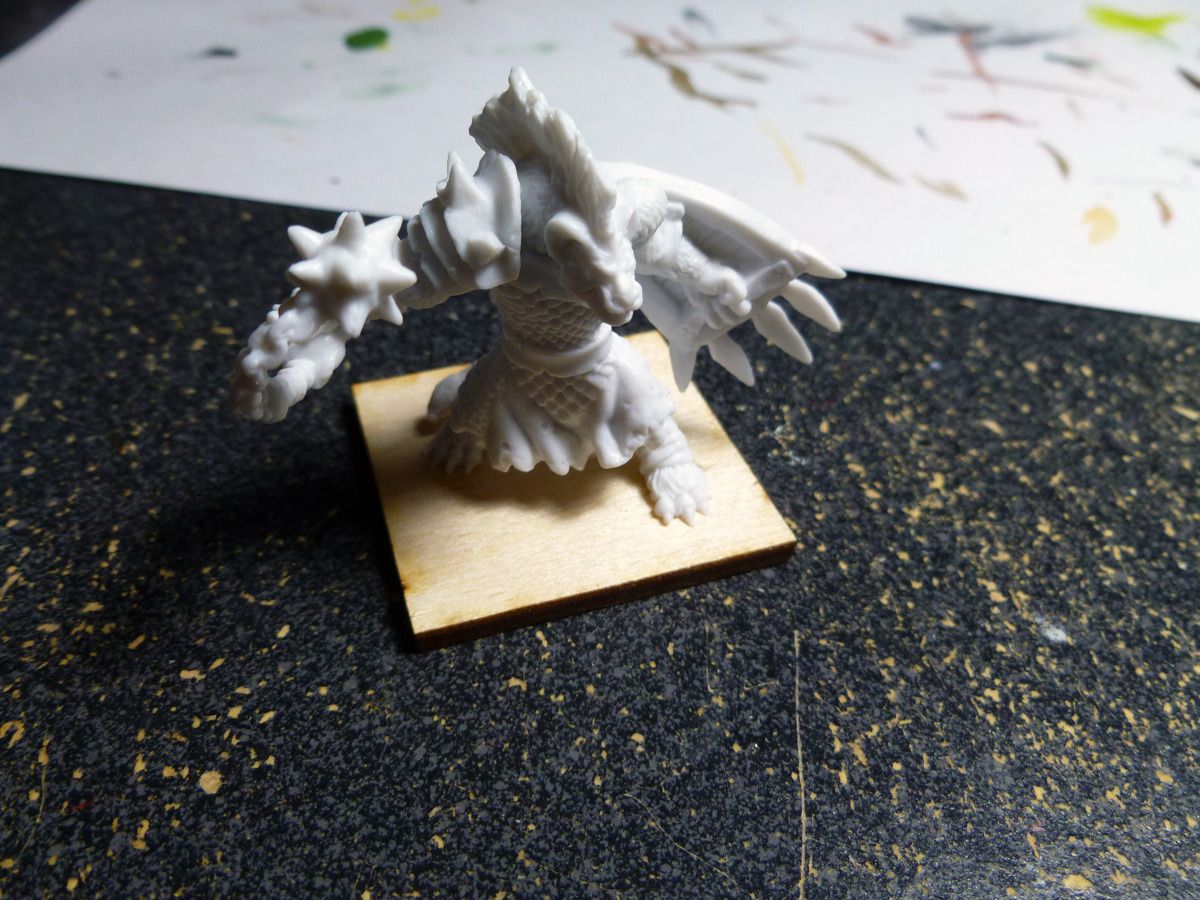
Enlarge Image

Let him sit for a bit to dry, then began to prep the base itself. Add a little white glue, and spread it with a toothpick. Be careful to keep it off of the miniature itself, but cover all of the areas of the base.
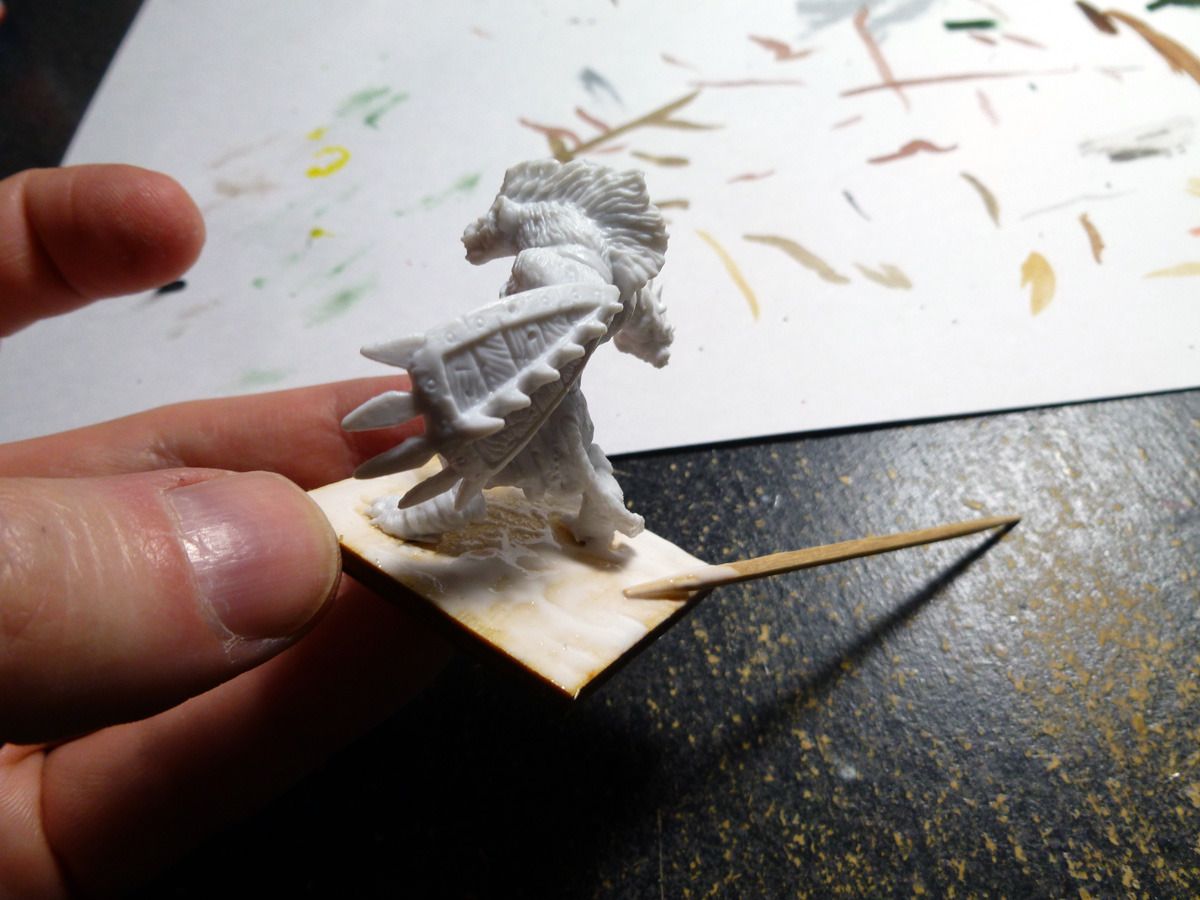
Enlarge Image

Now, dip the whole base into sand. Leave him there for a minute or so (but not much longer than that.) Set him aside, but don't shake off any excess yet. Carefully check around his feet and legs to make sure you didn't get any glue/sand on there. If so, use a toothpick or similar to remove it before the glue dries.
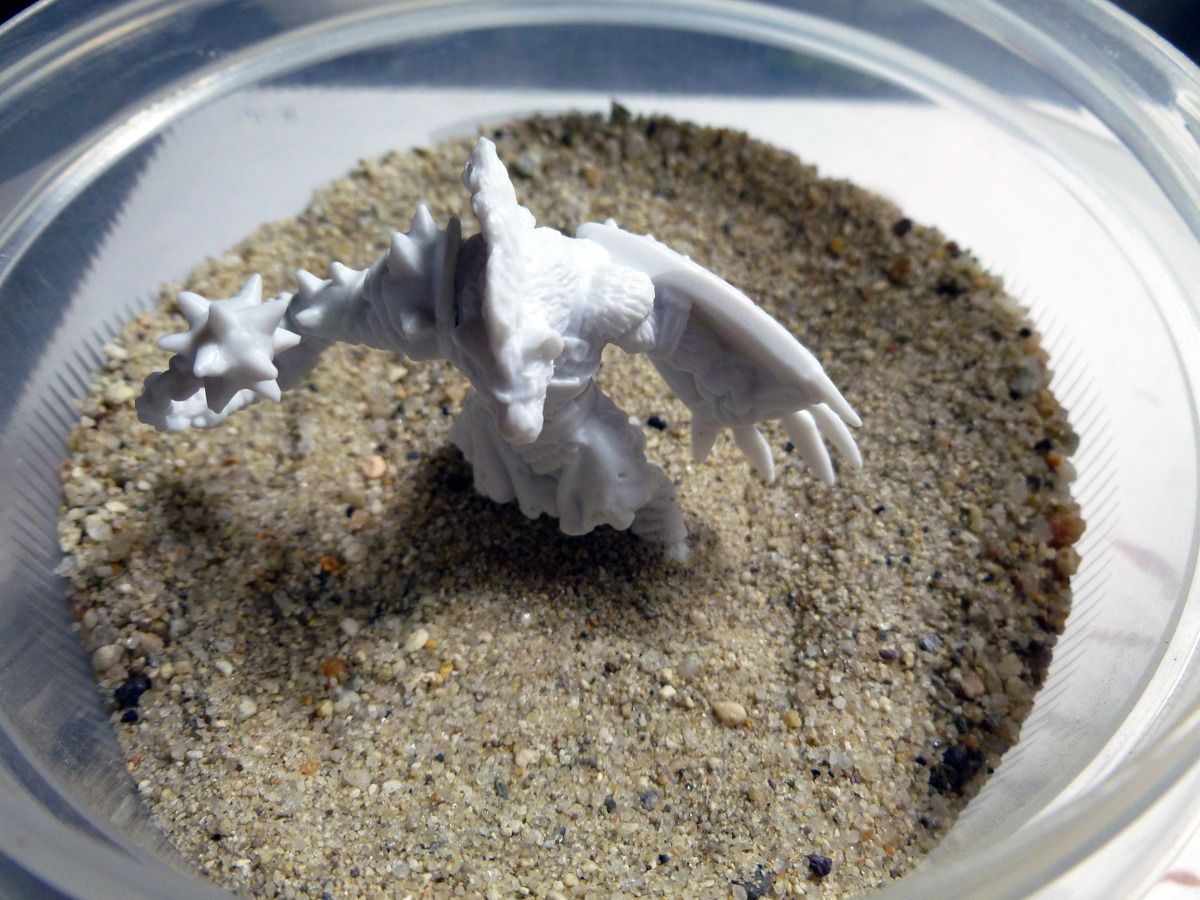
Enlarge Image

After a few hours, blow off the excess sand. I sometimes use a soft brush over the whole thing to make sure that all the loose sand is removed. The result is a nice, neat sand base, ready for priming.
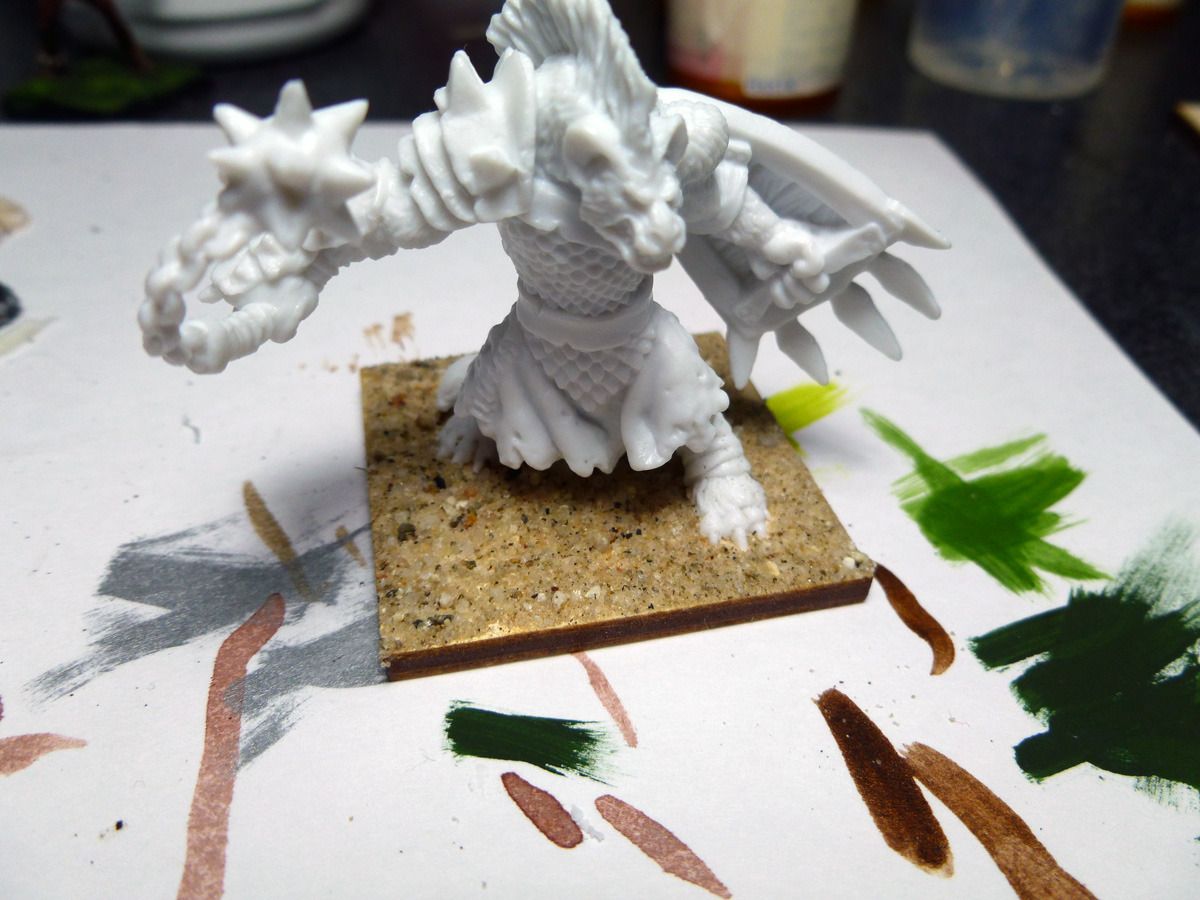
Enlarge Image


I'll get into basing later on when the time comes, but I'd like to show some of the basic options here.

One option, if you choose, is to take a little milliput and add some bumps and shaping to the base before sanding it. Here is what I'm talking about on a Bones troll's base:
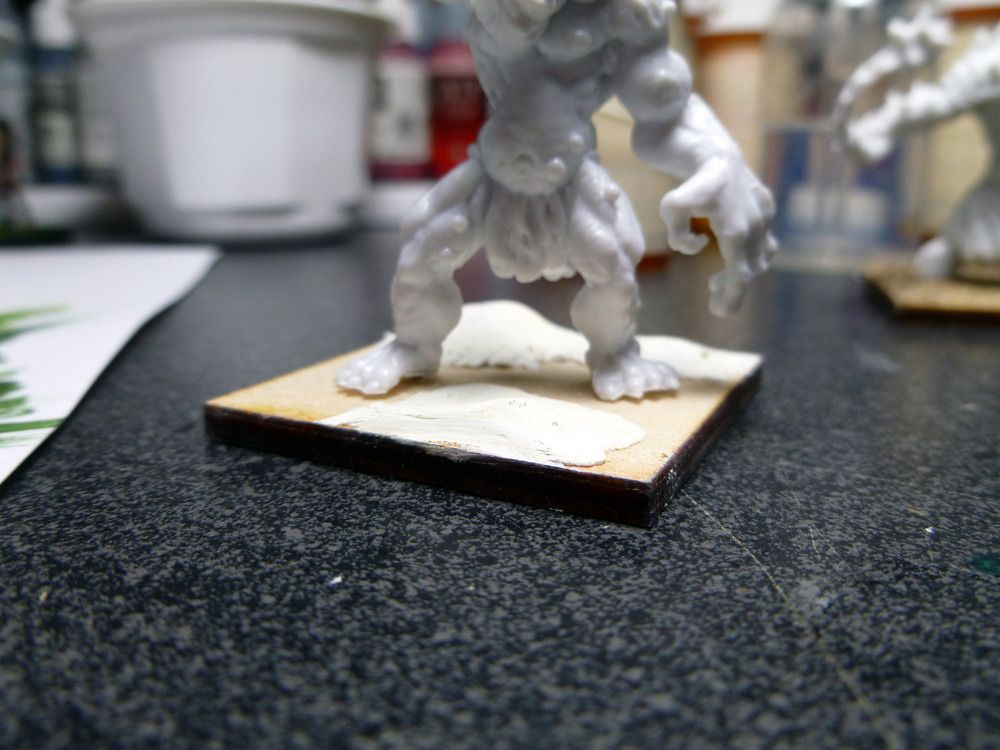
Enlarge Image

I'll give an example here to show what a base would look like, finished, with nothing but the sand. This is an 'in progress' piece I'm working on right now, and will be adding detail to her base later, but at this point it is painted as a simple sand base. The nice thing about this approach is that it is extremely durable. The sand is glued on the base, has a layer of primer over to help hold it down, several layers of paint, and will have a coat of varnish when the piece is done. It is quick, easy, cheap, and very durable, even if you don't go further. The woman with the crossbow, posted earlier, started off this same way.
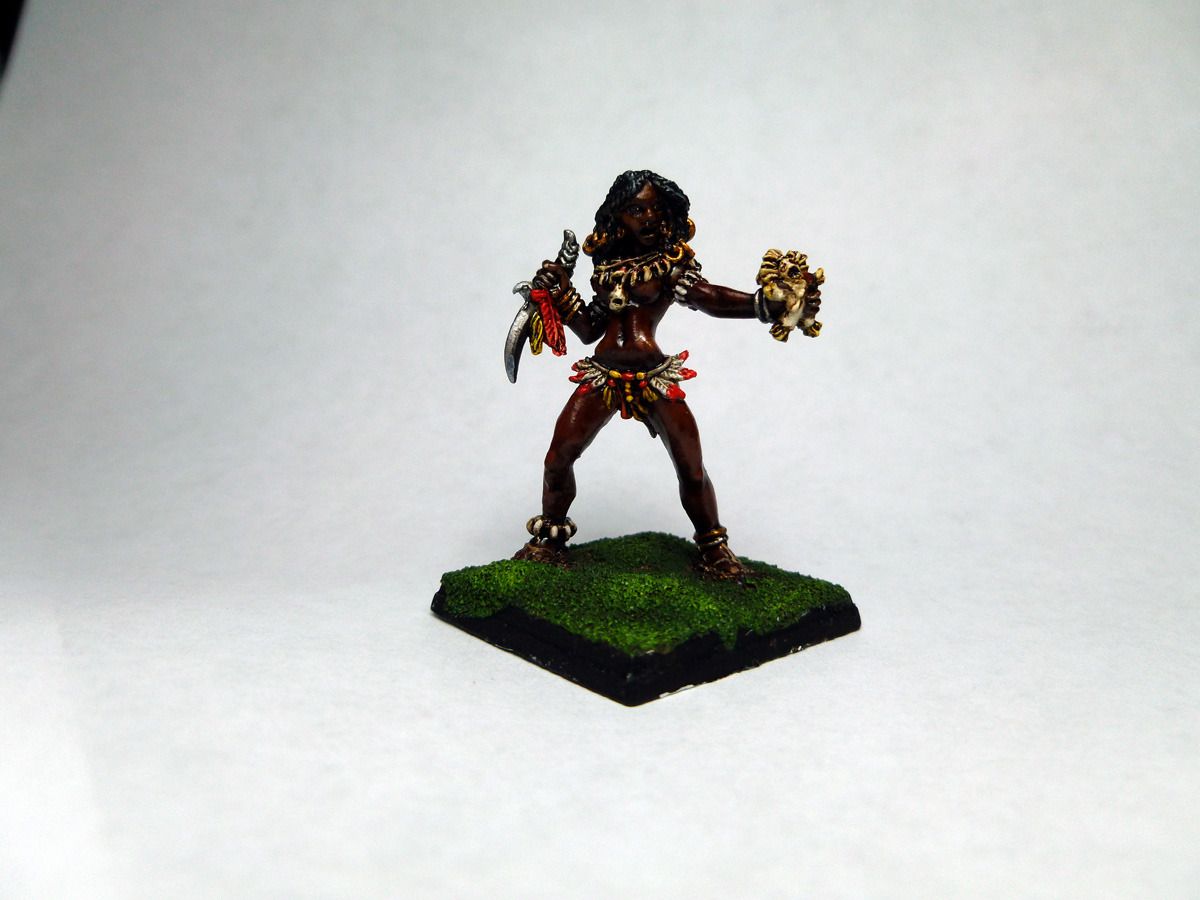
Enlarge Image

Another choice is to leave the broccoli base on and use milliput to build the rest of the base up to it, either leveling it with the top or making it look like the the figure is standing on a short hill.

Another alternative is to cover the whole base with milliput, then carve it. This fellow's flag stones were done this way, as was the halfling bard's I posted earlier. It is easier than it sounds. I have zero talent when it comes to sculpting, and still didn't have any trouble getting acceptable results:

Enlarge Image

Priming

Ok, moving on to priming. I can't discuss brush-on primers, as I don't use them. I use spray primers. The purpose behind priming is to give the paint a surface to stick to. Bones can be painted without priming, so long as you don't thin the base coats, but not thinning the base coats isn't my preferred way to work, so I'll prime anyway. Metal and plastic miniatures need primed regardless.

After my tests previously showed my usual Krylon primer (an enamel primer) didn't work on Bones, I did some research and decided to try Army Painter brand spray primer. It works beautifully on Bones, and I'm happy enough with the results that I'll be tossing my Krylon and using this stuff for all miniatures from now on. It is a fast drying spray acrylic designed specifically for miniatures.

We had some discussion before on primer colors. I prime white - it is just my preference, but some people prefer black or gray. I've used all three. In general, white primer leads to brighter miniatures with smoother blends. You have to paint the shadows in yourself, which results (in my opinion) with more natural shadows, as they tend to be colored. Black primer creates a more intense contrast, and the shadows tend to be much darker, while you have to paint more highlights. The pieces aren't as bright when you're done.

Now, certain pieces still work better with one or the other. I wouldn't want to paint an army of High Elves, in white robes and silver armor over black primer, but for an army of evil, chaotic warriors, it might be perfect. When I was playing Warhammer, I primed my Night Goblins with black, just because every one of them wore black.
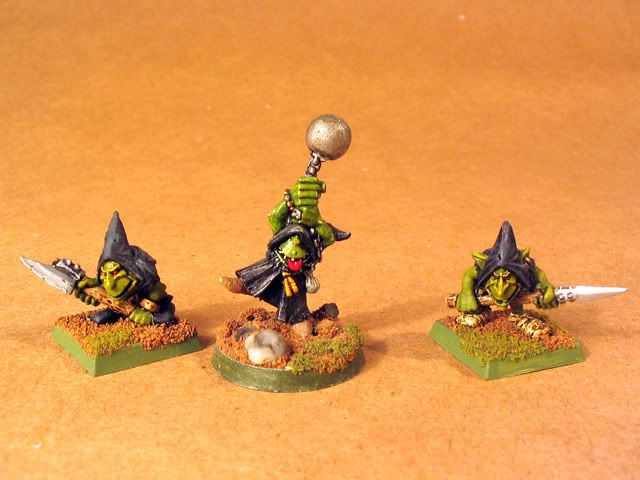
Image

If you were painting a large group of miniatures that were all predominantly the same color (say, blue lizardmen), then a colored primer might also be viable, although I've never used it myself. Another recent trend has been priming with gesso, but I have zero experience with this medium, so I can't really comment on it.

So, on to the priming. As mentioned earlier, there are several ways to hold a figure for spray priming. For an army, I like to get an old cereal box or something and hot glue them down, a few inches apart. For individual, like our gnoll, I prefer to use my spindles. Remember not to use much hot glue. You want to hold them in place for a few minutes, not give yourself headaches trying to remove them. Here's Boneflayer, ready to go:
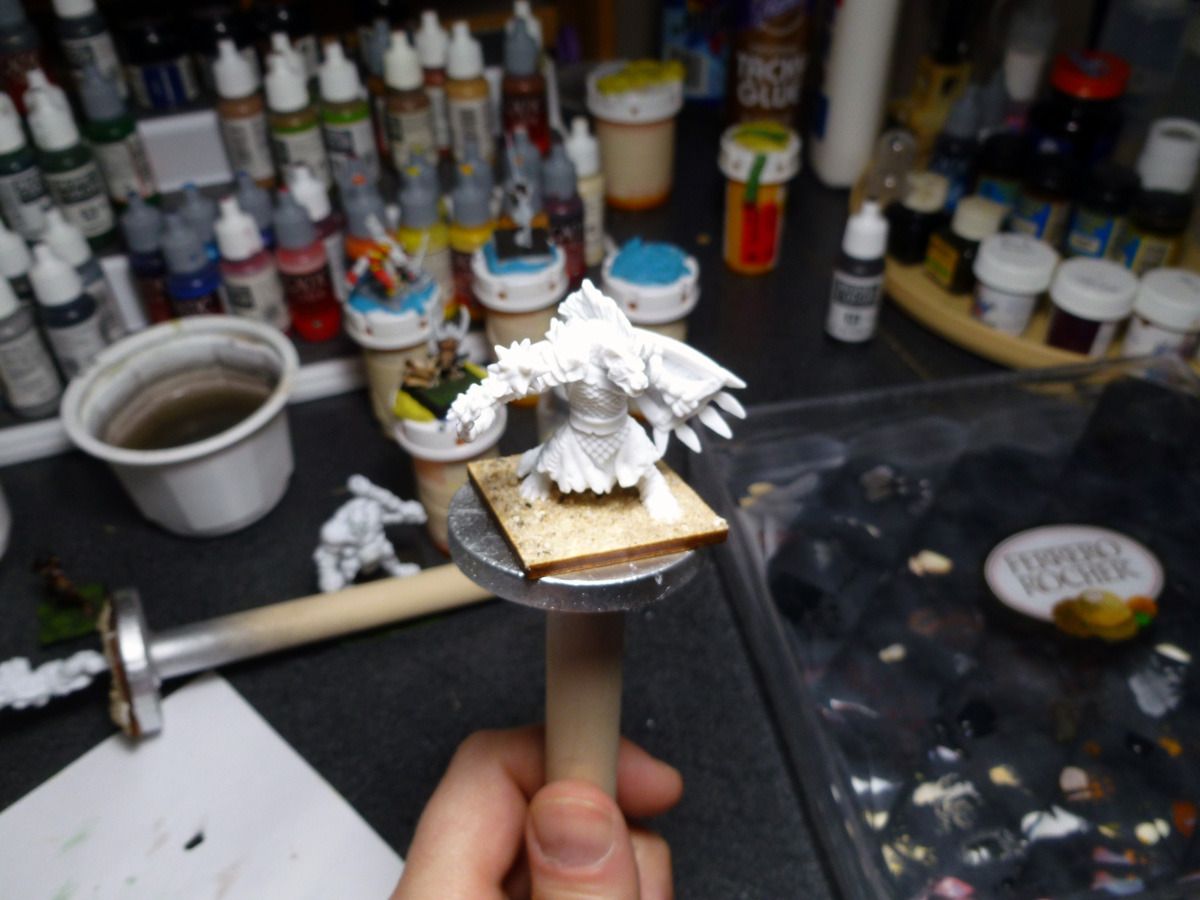
Enlarge Image

Now, when you prime a miniature, the goal is not to cover the miniature with an even layer of paint. Doing so achieves two things: 1) you trade the too-smooth natural surface for another too-smooth surface, and 2) you end up filling in details with paint. Remember the guy who painted a baseball with many layers of paint?
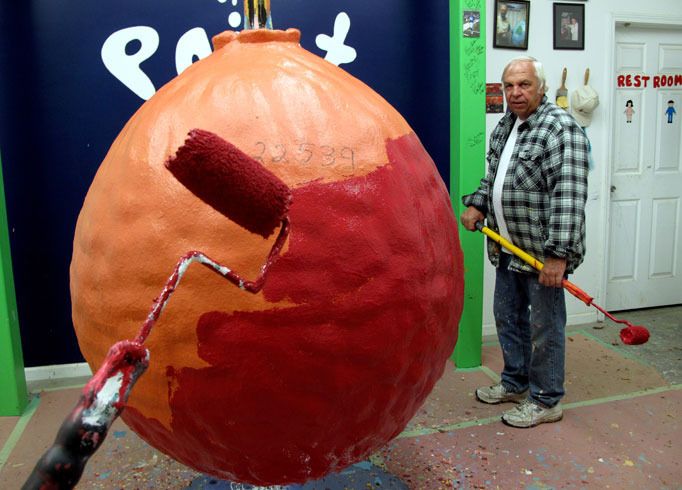
Enlarge Image

You don't want too much paint on your miniature for the same reason. You don't want it to be pure white (or black, or...) Areas where you can still see the metal are perfectly fine, and the surface should be a tiny bit uneven. Not speckled, but not smooth white, either. That's the point - you want to create a surface the paint can stick to. A lot of people over-prime their miniatures.

Paint at the right distance (six inches to one foot on most cans, experiment with yours on a piece of wood.) Paint in short bursts rather than holding down the button the whole time. One good tip is not to prime the same spot twice. It's good enough.

Here's Boneflayer, primed.

Enlarge Image

Unfortunately, he is primed white over white plastic, so you really can't see much. Here is an image I found of a bust primed just the way I'm talking about:

Enlarge Image

You'll notice that he didn't make the thing pure, shining white. You can see lots of the underlying material, particularly in the hair and beard. Note: The site I found that example on has a fantastic primer on priming (hork.) It goes into far more detail than I am. check it out.

Alrighty, then. This is caught up to where I'm at on this piece. I suppose I should put brush to paint next.
What doesn't kill me makes me stranger.
User avatar
Blackhawk
Posts: 46010
Joined: Tue Oct 12, 2004 9:48 pm
Location: Southwest Indiana

Re: [Miniatures] Painting tips and progress reports (with pi

Post by Blackhawk »

An aside - my current in-progress pieces:

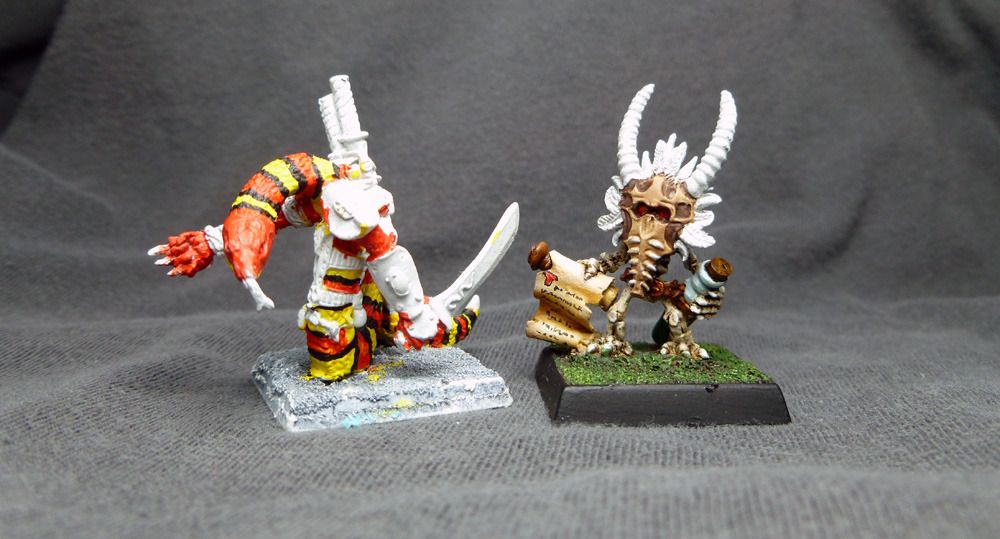
Rhasia, Zombie Queen and Boneflayer

Enlarge Image

Kulan, Nagendra assassin and Rhasia's familiar. Rhasia came with a voodoo mask. I like it, but don't want to cover up her face, so I grabbed a basic skeleton familiar (half sized skeleton with a potion jar and scroll) and stuck the mask on.

Enlarge Image
What doesn't kill me makes me stranger.
User avatar
Boudreaux
Posts: 2816
Joined: Fri Oct 15, 2004 12:18 am
Location: St. Louis

Re: [Miniatures] Painting tips and progress reports (with pi

Post by Boudreaux »

Saw an article posted on Boardgamegeek about miniature painting that had a really clever priming technique. He started out priming the entire figure with black, then primed with a quick spray of white primer from above to mimic the lighting and hightlights:

Image

This creates a natural shadowed effect, and makes it really easy to see what parts of the mini will be in shadow and what parts need to be highlighted. Parts that you want to be bright and highlighted are already white, and parts you want to be dark and shadowed are already black.
User avatar
Blackhawk
Posts: 46010
Joined: Tue Oct 12, 2004 9:48 pm
Location: Southwest Indiana

Re: [Miniatures] Painting tips and progress reports (with pi

Post by Blackhawk »

That's called zenithal highlighting. It doesn't just have to be done from above - put the can anywhere you want the light source to be and the primer will play photons all over your piece. Not only that, if you use a thinned paint, the different shades of primer will show through and darken/lighten the shade for you, which is especially useful on metal.

I've read a good bit about it, but I've never tried it.

What I have done, though, is to take a single point light (like a pen light) and hold it near a primed miniature where I want the light source to be, then photograph it and use the image as a shading guide.
What doesn't kill me makes me stranger.
User avatar
YellowKing
Posts: 31133
Joined: Wed Oct 13, 2004 2:02 pm

Re: [Miniatures] Painting tips and progress reports (with pi

Post by YellowKing »

Say what? You thin your primer? I can't say I've ever heard of anyone doing that, but then again, these days spray primer is the most common type.
First time I've ever done it. I was using some new paints and was afraid they were a little thick so I thinned them just a hair. Turns out just a hair is enough to screw it up.

Think when I redo him I'll go spray primer.
User avatar
TiLT
Posts: 4435
Joined: Sun Oct 17, 2004 7:01 am
Location: Trondheim, Norway
Contact:

Re: [Miniatures] Painting tips and progress reports (with pi

Post by TiLT »

YellowKing wrote:
Say what? You thin your primer? I can't say I've ever heard of anyone doing that, but then again, these days spray primer is the most common type.
First time I've ever done it. I was using some new paints and was afraid they were a little thick so I thinned them just a hair. Turns out just a hair is enough to screw it up.
Think when I redo him I'll go spray primer.
Brush primer seems to be most common (but still less common than spray) amongst advanced painters, who may use it almost as a simple basecoat by priming different parts in different colors. I recommend spray primer anyway. :)
Insert witty comment here.
User avatar
YellowKing
Posts: 31133
Joined: Wed Oct 13, 2004 2:02 pm

Re: [Miniatures] Painting tips and progress reports (with pi

Post by YellowKing »

I hit up my local game shop today and realized they stocked a very nice selection of Vallejo miniature paints at the same price (and even a little cheaper, depending on the site) that I can get them online.

Because I had some in-store credit, I decided to splurge and bought around a dozen bottles - enough to at least get the basics and some shading down on my two minis. I'll pick up some more next week.

I'm pretty excited about finally getting some decent, dedicated miniature paints. The acrylics I had been using were general purpose, off-brand cheap crap. To be fair, I used to use these years ago when I painted minis (and didn't have access to good paints) and got decent results. However, they required a lot of work - lots of thinning, lots of stirring, and they tended to clot up quickly.

I stripped the minotaur down (easily, due to the cheap-ass paints I was using), and plan to prime him tonight. Probably won't post any pics until I get the base colors on.
User avatar
hentzau
Posts: 15227
Joined: Thu Oct 21, 2004 11:06 am
Location: Castle Zenda, Ruritania

Re: [Miniatures] Painting tips and progress reports (with pi

Post by hentzau »

Love Vallejo paints. I had switched to them from GW paints right before I stopped painting, but I really liked the way they covered. I did need to thin them, they come out of the bottles a little thick.
“We can never allow Murania to become desecrated by the presence of surface people. Our lives are serene, our minds are superior, our accomplishments greater. Gene Autry must be captured!!!” - Queen Tika, The Phantom Empire
User avatar
Isgrimnur
Posts: 84864
Joined: Sun Oct 15, 2006 12:29 am
Location: Chookity pok
Contact:

Re: [Miniatures] Painting tips and progress reports (with pi

Post by Isgrimnur »

I should get my 1/8" hose and 1/8-1/4 adapter for my 1/4-airbrush hose tomorrow, so I can finally start working with the airbrush and spray down my undercarriage.

I've got all four wheel assemblies complete and started working on the steering wheel. SG Black center assembly, flat black wheel, and about seven different color buttons that are about the size if a pinhead.
It's almost as if people are the problem.
Post Reply